Harbor
Overview
ARMO platform allows you to scan container images from your Harbor registry to detect vulnerabilities. This guide provides step-by-step instructions to connect your Harbor registry with the ARMO platform.
Prerequisites
- Access to the Harbor Portal with Administrator permissions.
- An active ARMO account.
Quick Guide: Generating Harbor Registry Credentials
- Log in to the Harbor Portal.
- Go to Administration > Robot Accounts.
- Click + New Robot Account and enter:
- Name: Provide a meaningful name (e.g.,
armo-scan-bot). - Expiration: Set an expiration time (e.g., "Never Expires").
- Name: Provide a meaningful name (e.g.,
- Click Next and proceed to Project Permissions.
- Assign the following permission:
- Repository: Enable Pull and Read permissions.
- Complete the setup and copy the Robot Account name and Secret (password).
Step-by-Step Guide
Step 1: Navigate to the Integrations Page
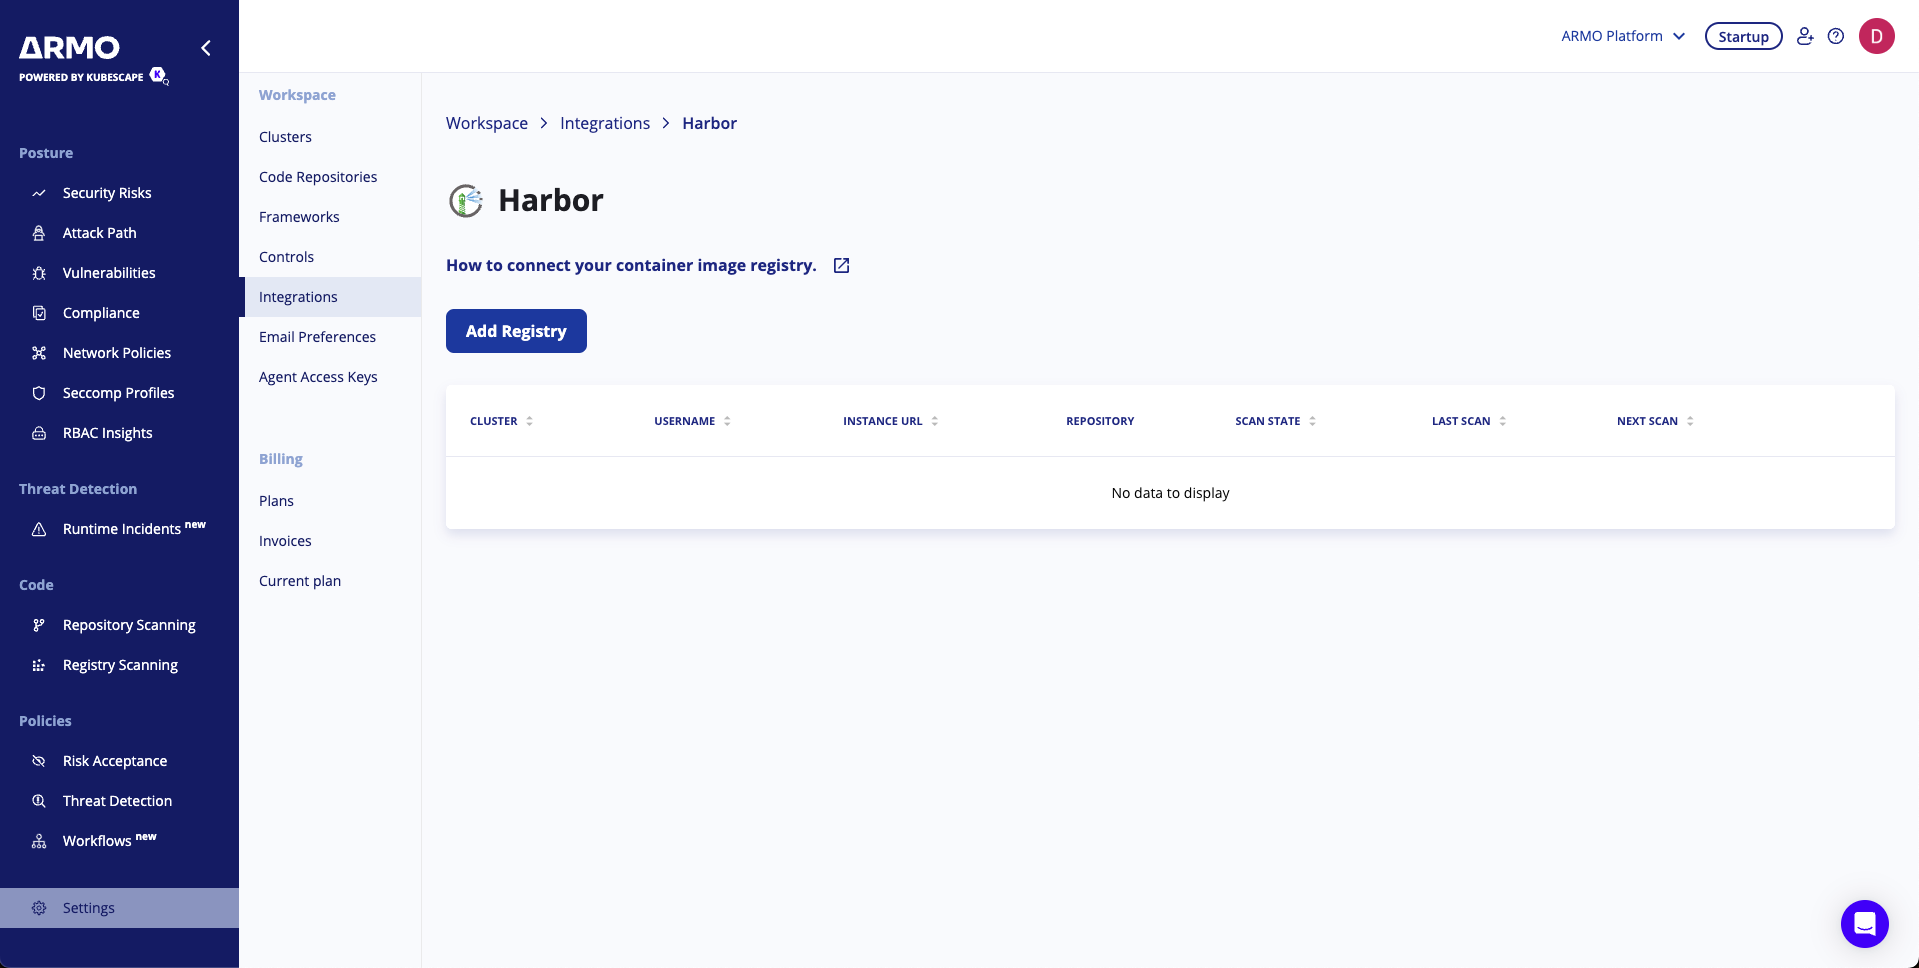
Log in to the ARMO platform and navigate to the Integrations page:
- Go to Settings > Integrations.
- Under Container Registries, click Connect for Harbor.

Step 2: Add a New Harbor Registry
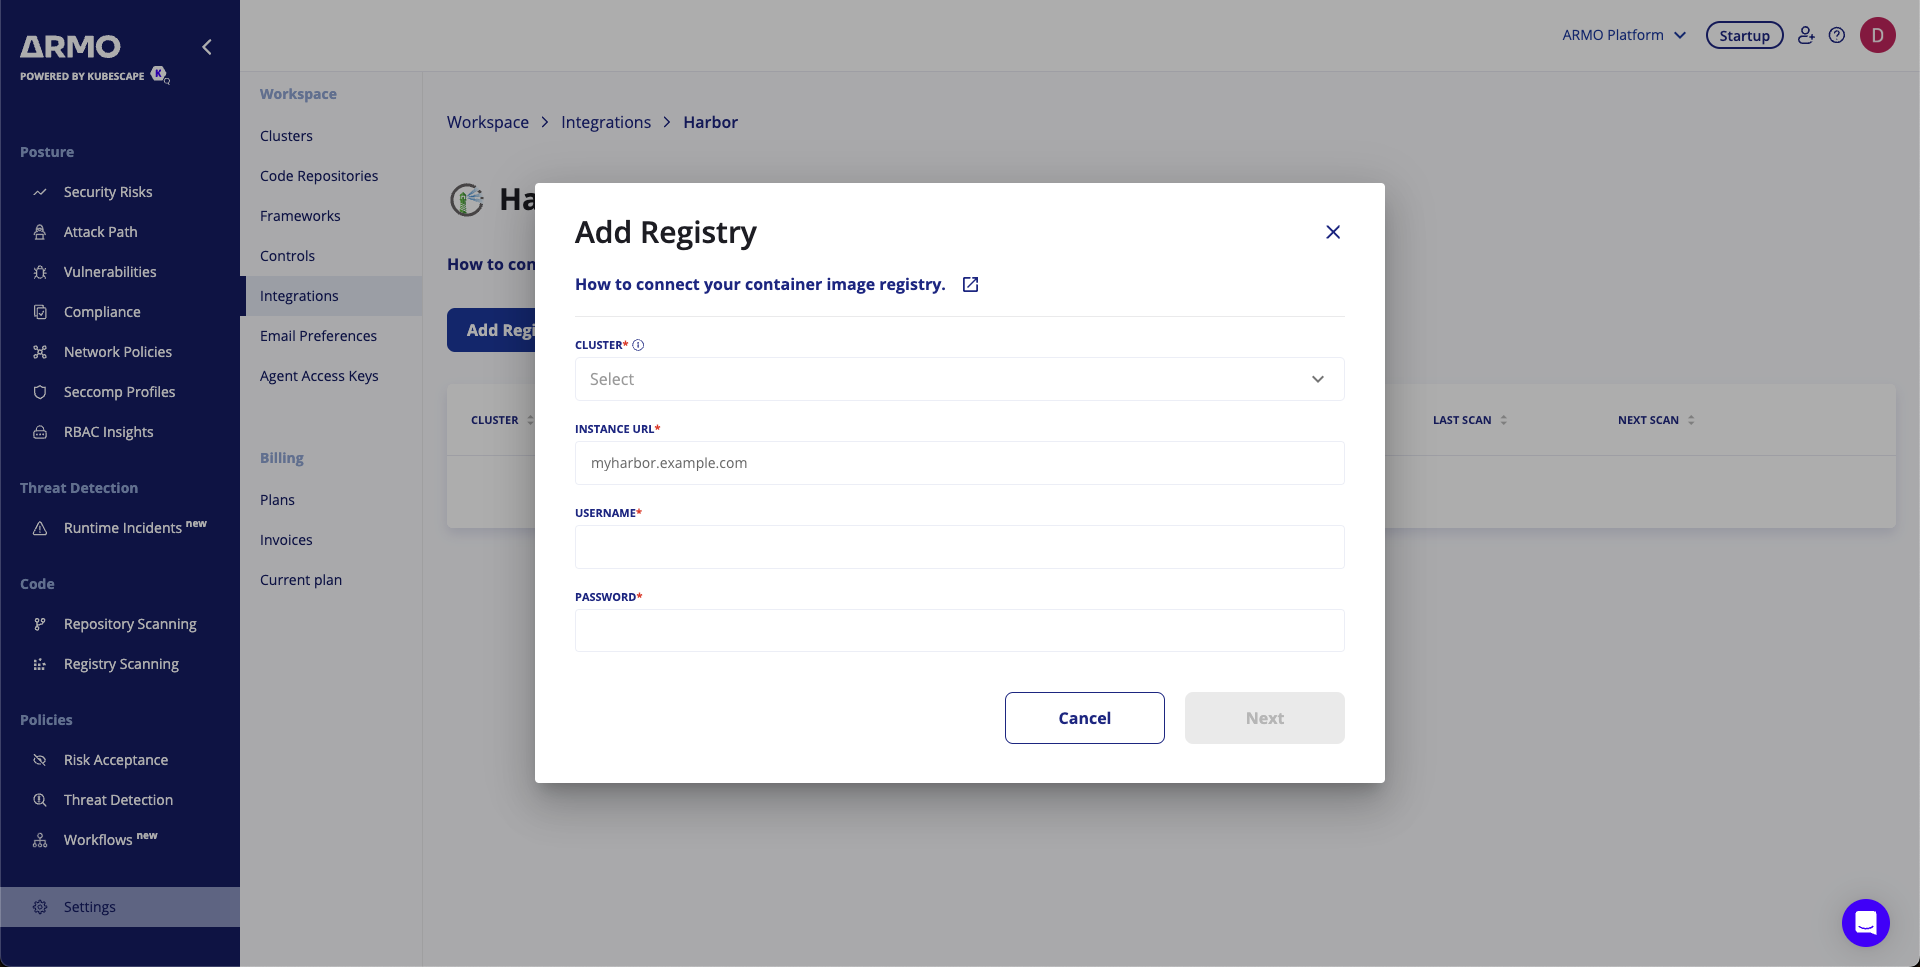
Click Add Registry to begin configuration:

Cluster: Select the cluster where the scanning will run.
- Instance URL: Enter your Harbor instance URL (e.g.,
harbor.example.com). - Username: Enter the Robot Account name.
- Password: Paste the copied Secret.
Click Next to proceed.

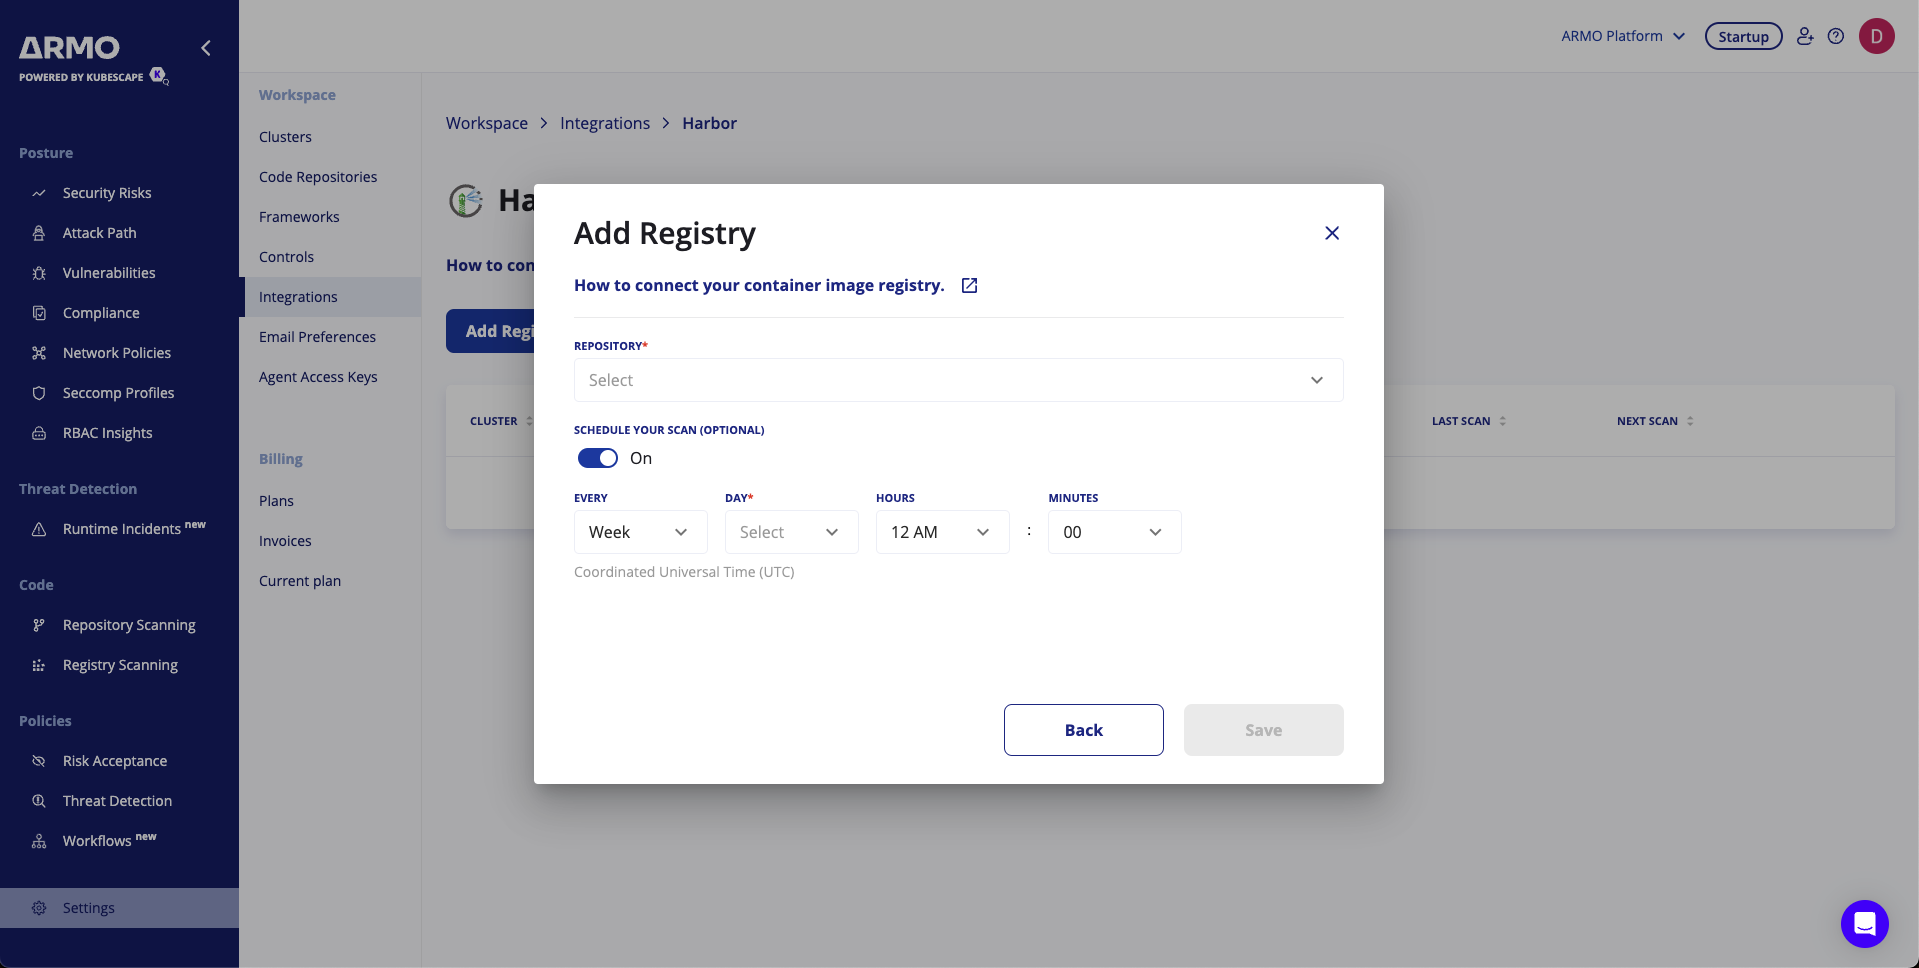
Step 3: Schedule Scans (Optional)
To schedule periodic scans for your repositories:
- Enable Schedule Your Scan.
- Set the frequency (e.g., weekly) and time (UTC).
Click Save to finalize.

Step 4: Finalize the Connection
Review the configuration and click Save. Your Harbor registry is now connected to the ARMO platform.

Conclusion
By integrating Harbor with the ARMO platform, you ensure automated vulnerability scans and maintain a secure Kubernetes environment. This integration provides continuous insights into the security posture of your container images.
Updated 3 months ago
