Quay.io
Overview
ARMO platform allows you to scan container images from your Quay.io for vulnerabilities. This guide provides step-by-step instructions to connect your Quay.io container registry with the ARMO platform.
Prerequisites
- Access to your Quay.io account.
- A Robot Account with read access to the required repositories.
- An active ARMO account.
Quick Guide: Generating Quay.io Credentials
- Log in to your Quay.io account.
- Navigate to Robot Accounts under your Organization settings.
- Click Create Robot Account and give it a unique name.
- Assign the Robot Account Read access to the target repository.
- Copy the Username (e.g.,
organization+robot) and Token (password).
Step-by-Step Guide
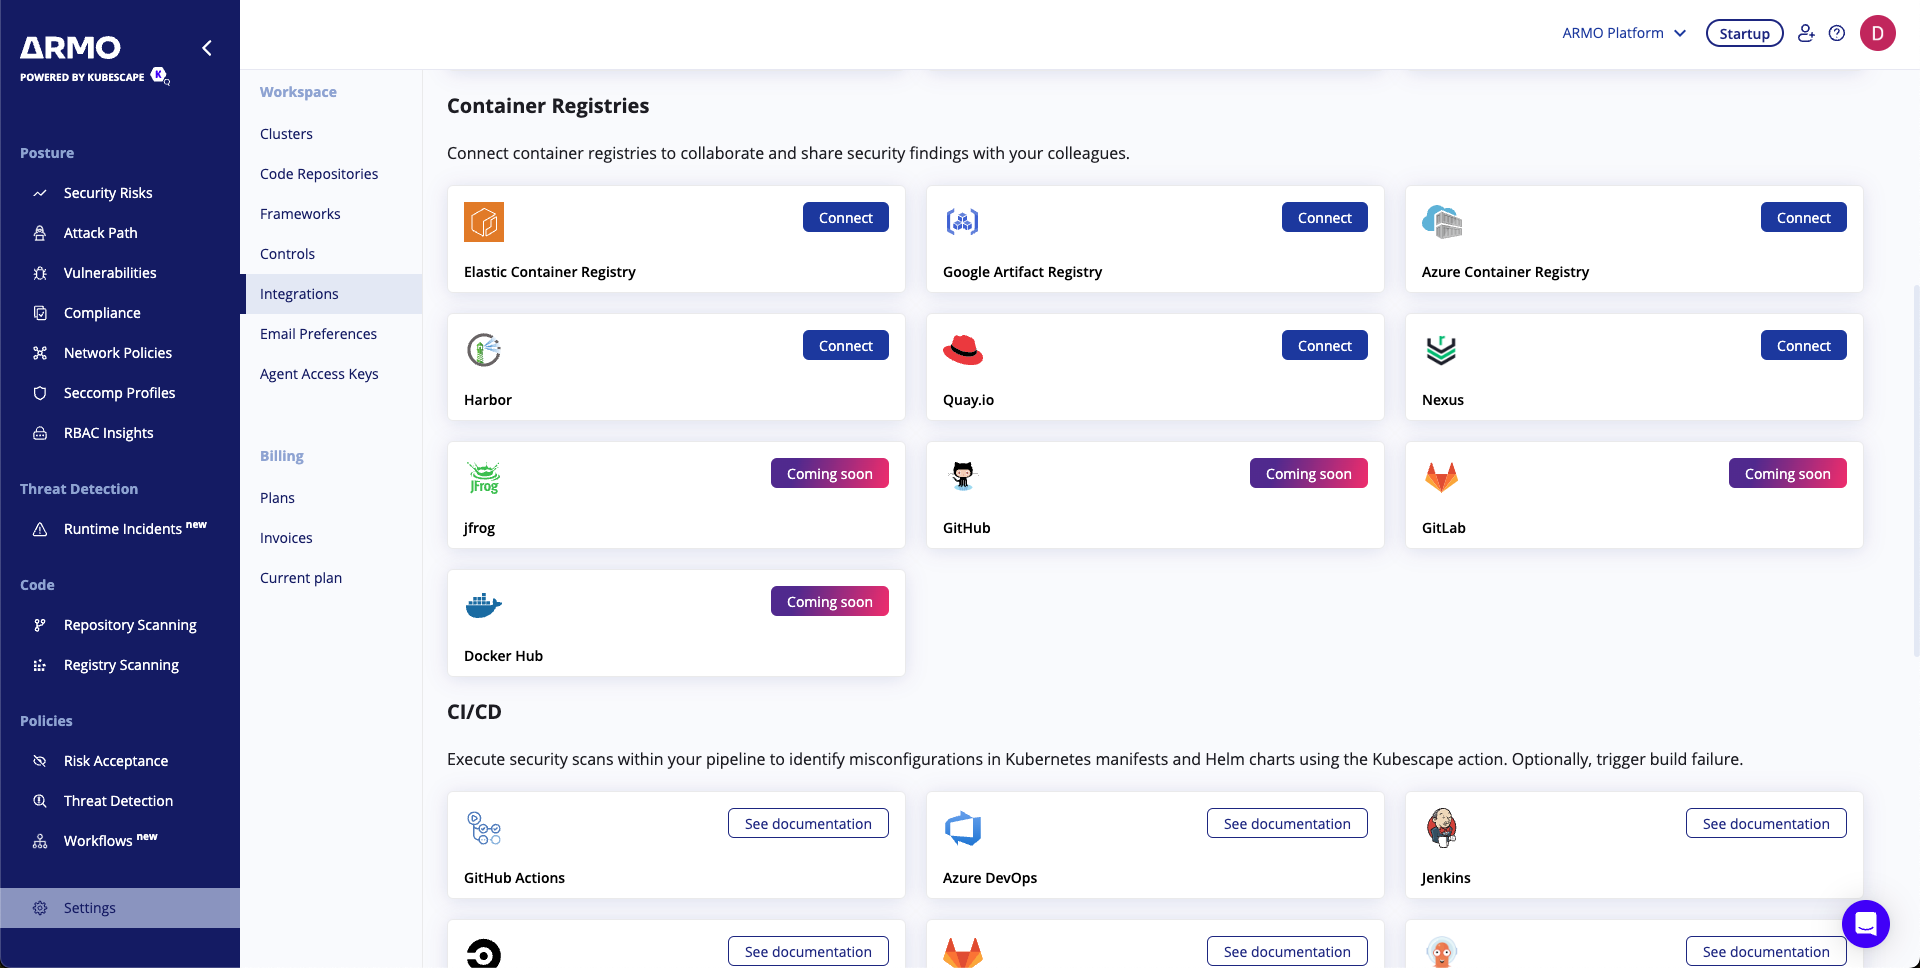
Step 1: Navigate to the Integrations Page
Log in to the ARMO platform and go to the Integrations page:
- Go to Settings > Integrations.
- Under Container Registries, click Connect for Quay.io.
Step 2: Add Quay.io Registry
-
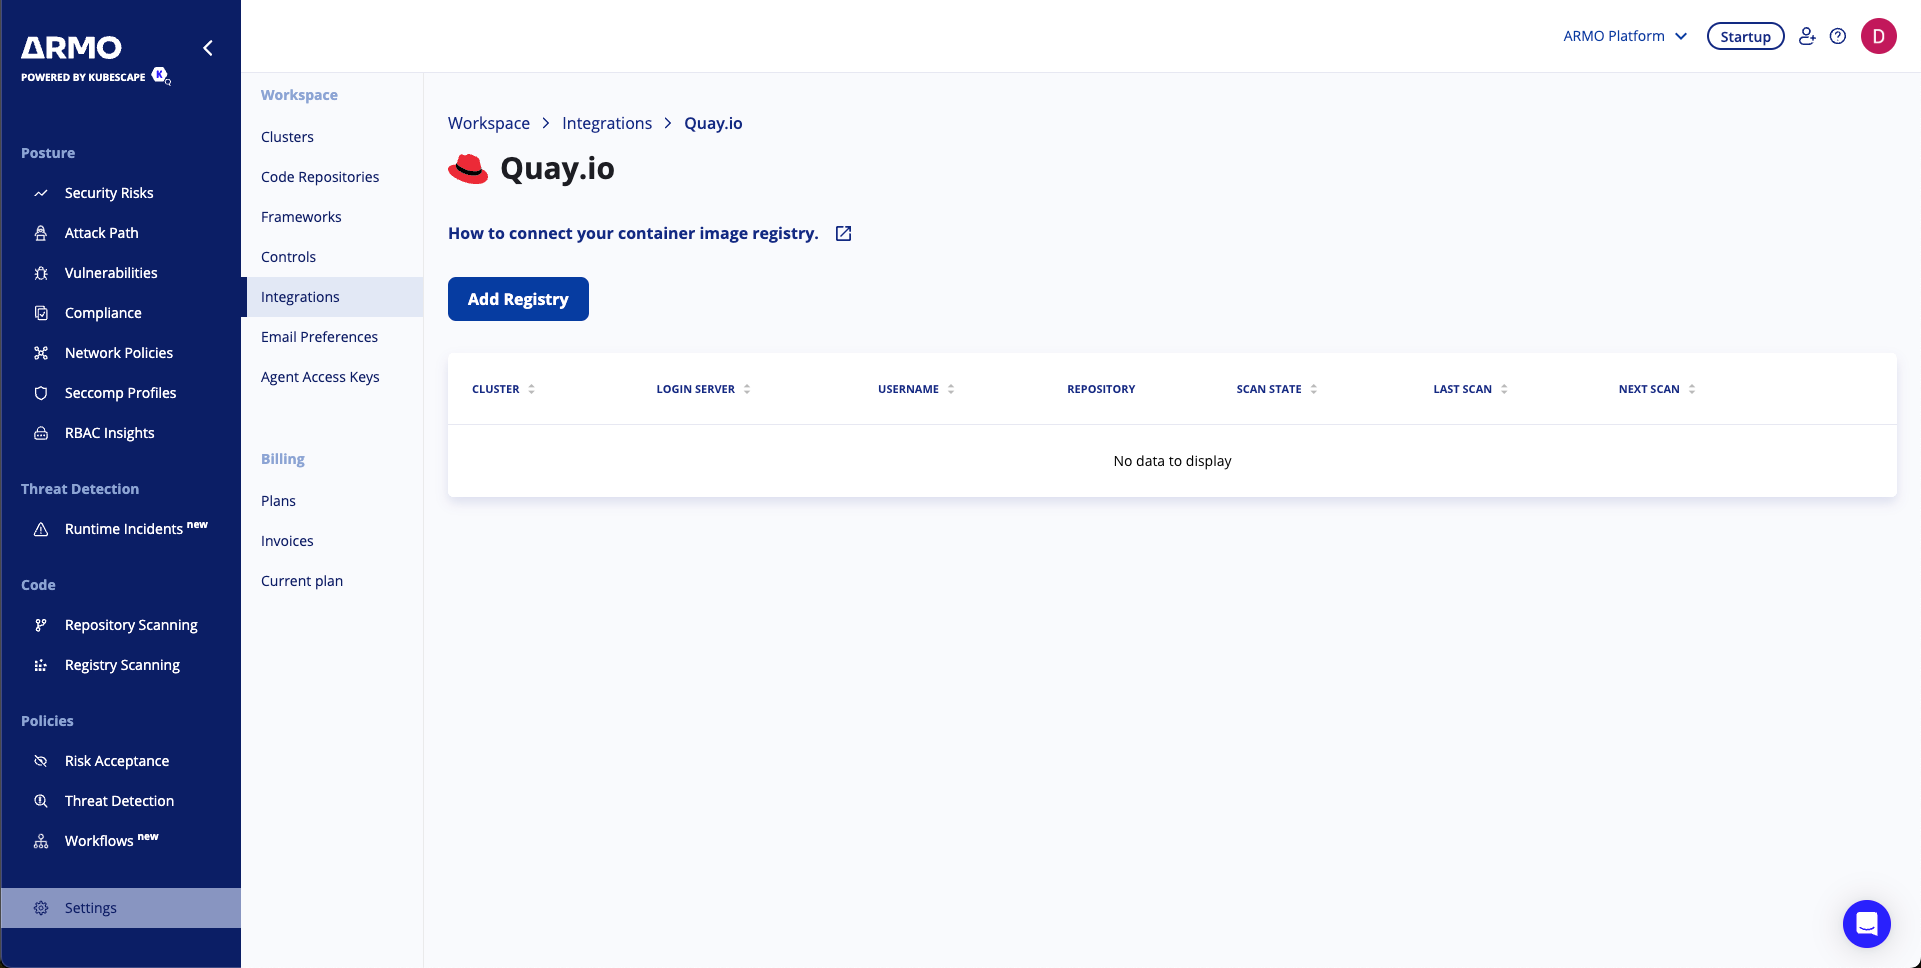
Click Add Registry to configure the connection.
-
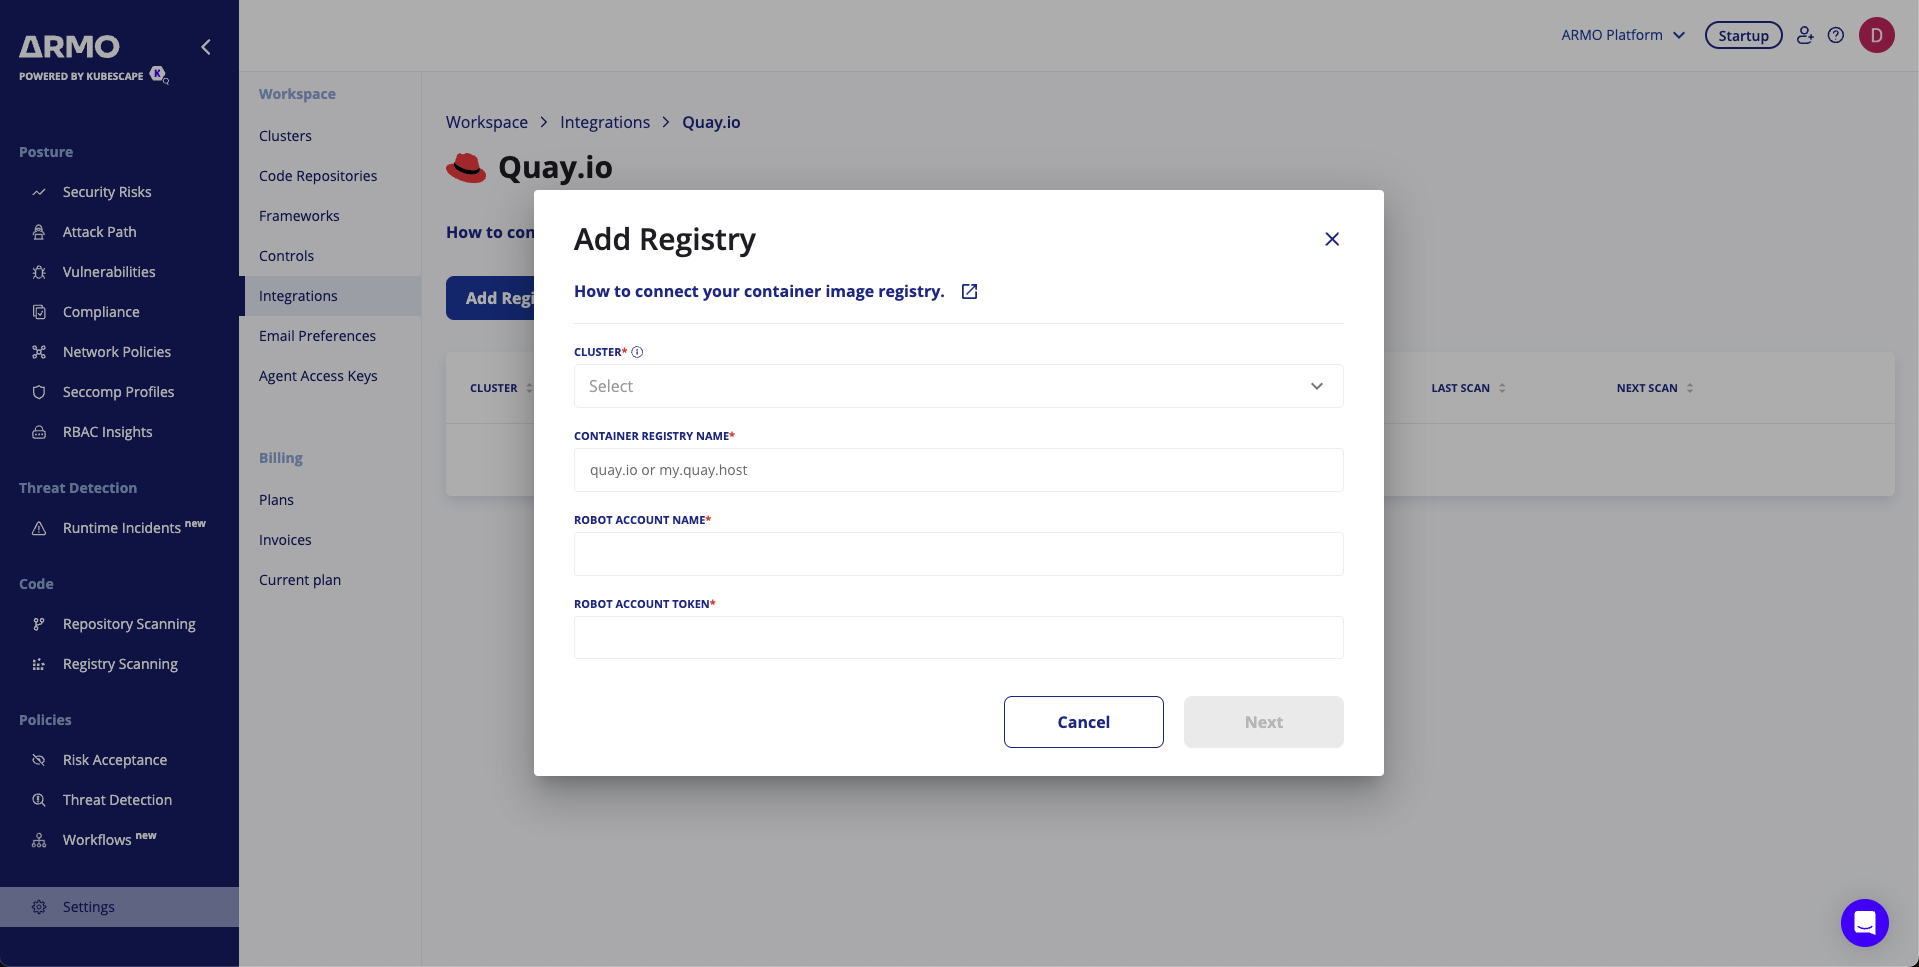
Fill in the details:
- Cluster: Select the cluster for initiating scans.
- Container Registry Name: Enter
quay.ioor a custom Quay.io host. - Robot Account Name: Enter the username of your Quay.io Robot Account.
- Robot Account Token: Paste the token (password) for the Robot Account.
-
Click Next to proceed.
Step 3: Schedule Scans (Optional)
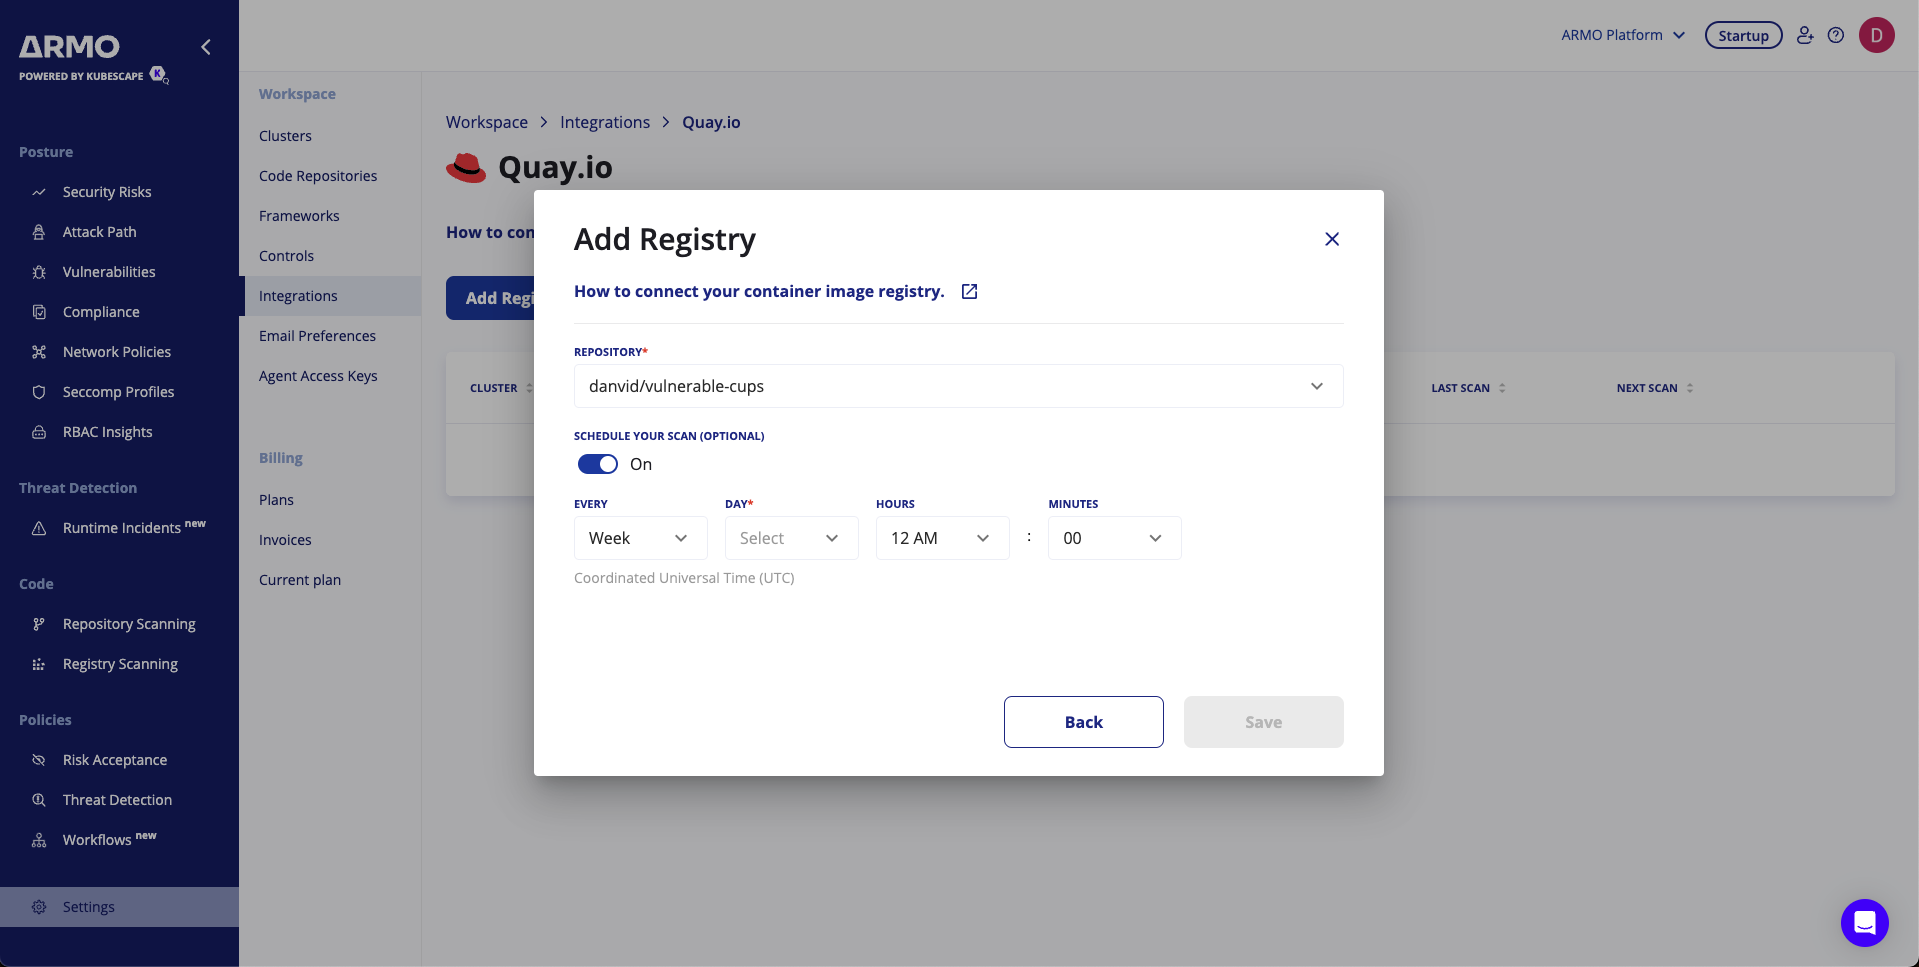
You can configure periodic scans:
- Repository: Enter the repository name (e.g.,
myproject/app). - Enable Schedule Your Scan and set the:
- Frequency: Weekly or Daily.
- Time: Choose execution time in UTC.
Click Save to confirm.
Step 4: Finalize Integration
- Review the configuration.
- Click Save to complete the setup.
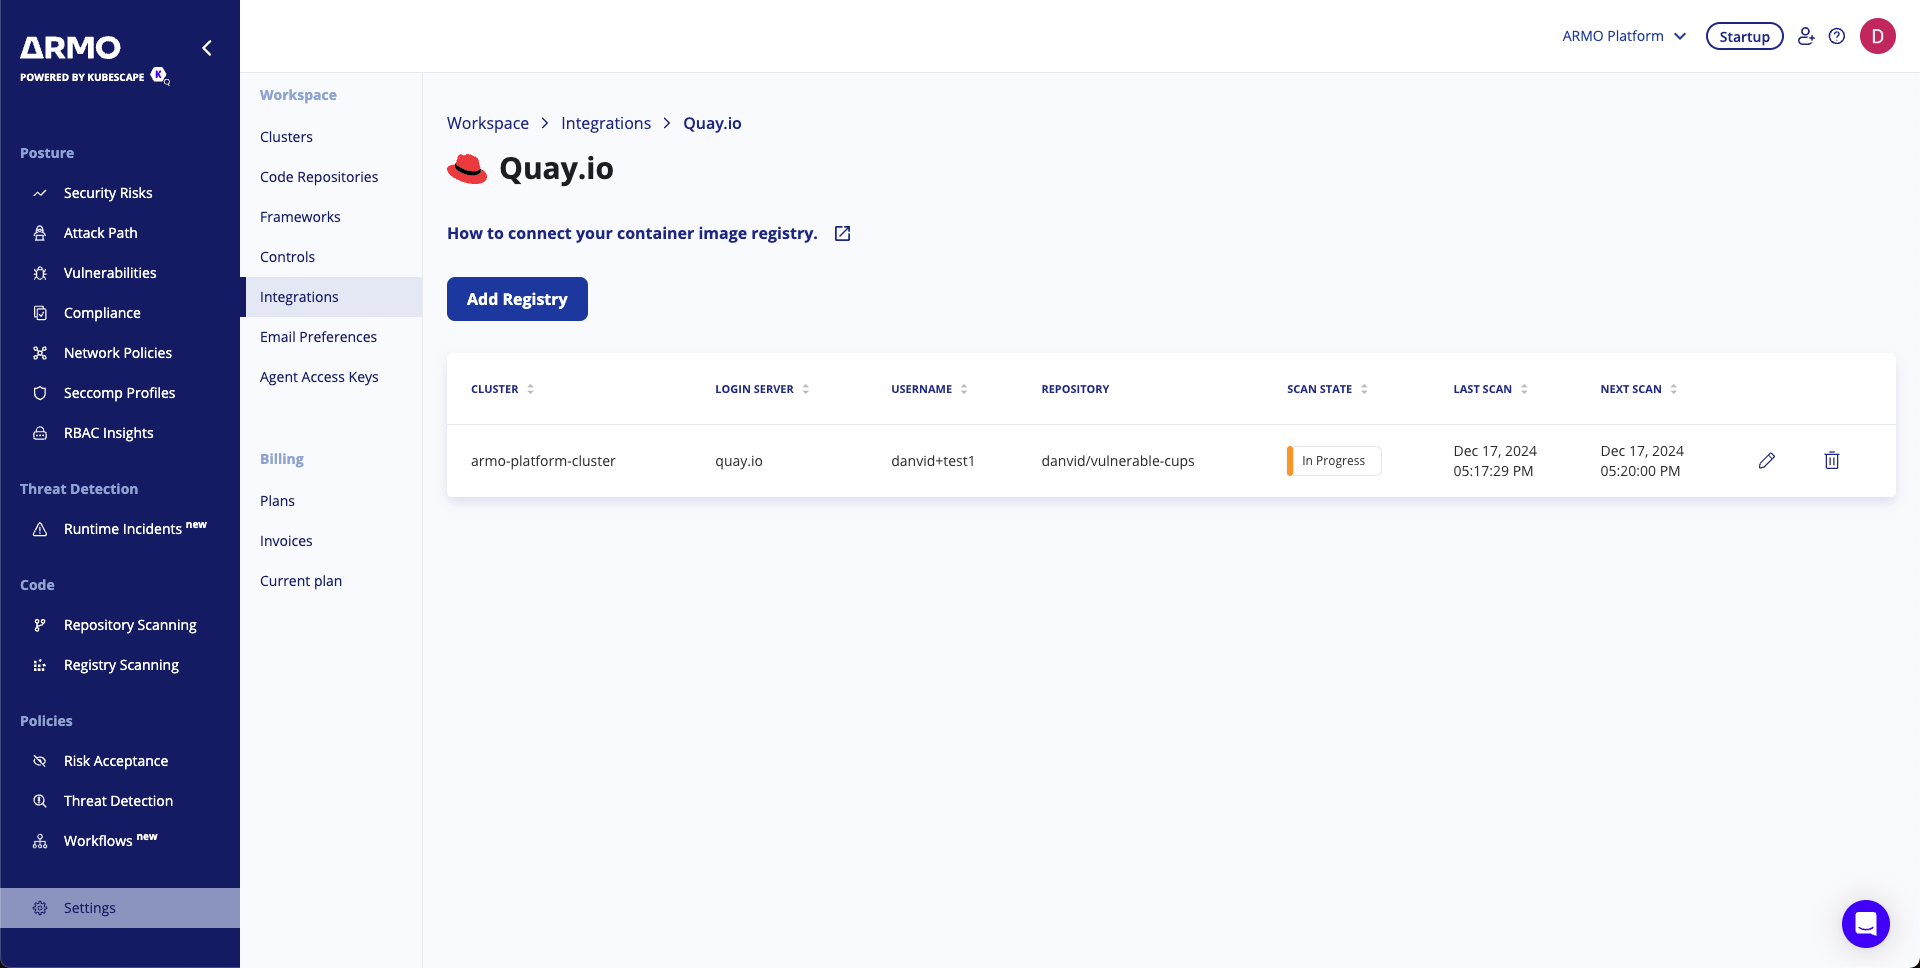
Your Quay.io registry is now connected to the ARMO platform, and scans will be initiated as per your configuration.
Conclusion
By integrating Quay.io with the ARMO platform, you gain visibility into vulnerabilities in your container images and maintain a secure Kubernetes environment with automated scans and actionable insights.
Updated 3 months ago
