Network Policy
Kubernetes Network Policy
About
Kubernetes Network Policies allow you to control the network traffic between pods in a cluster, providing an additional layer of security. It helps to isolate the microservice applications from each other and allows developers to focus on application development without requiring a deep understanding of low-level networking.
These policies let you decide how one part of your application (called a "pod") talks to other parts or external things like other pods, namespaces, or IP addresses.
Here are the key points:
- Entities You Control: You can control communication between your pods, different namespaces, and specific IP addresses.
- Selectors: When dealing with pods or namespaces, you use selectors to decide what's allowed. It's like specifying which pods can talk to each other.
- IP Blocks: When using IP-based policies, you define rules based on ranges of IP addresses (CIDR ranges).
Remember, a pod can't stop itself from talking to itself, and traffic to and from the node where a pod is running is always allowed.
How does it work?
The Kubernetes Network policy works by allowing you to define rules that control how pods communicate with each other and other network endpoints in a cluster.
If selectors match a pod in one or more NetworkPolicy objects, then the pod will accept only connections that are allowed by at least one of those NetworkPolicy objects. A pod that is not selected by any NetworkPolicy objects is fully accessible.
Default policies
By default, if no policies exist in a namespace, all ingress and egress traffic is allowed to and from pods. The following examples let you change the default behavior in that namespace.
Default deny all ingress traffic
You can create a "default" ingress isolation policy for a namespace by creating a NetworkPolicy that selects all pods but does not allow any ingress traffic to those pods.
---
apiVersion: networking.k8s.io/v1
kind: NetworkPolicy
metadata:
  name: default-deny-ingress
spec:
  podSelector: {}
  policyTypes:
  - Ingress
Allow all ingress traffic
If you want to allow all incoming connections to all pods in a namespace, you can create a policy that explicitly allows that.
---
apiVersion: networking.k8s.io/v1
kind: NetworkPolicy
metadata:
  name: allow-all-ingress
spec:
  podSelector: {}
  ingress:
  - {}
  policyTypes:
  - Ingress
Default deny all egress traffic
You can establish a default egress isolation policy for a namespace by crafting a NetworkPolicy. This policy should select all pods within the namespace but restrict any egress traffic from those selected pods.
---
apiVersion: networking.k8s.io/v1
kind: NetworkPolicy
metadata:
  name: default-deny-egress
spec:
  podSelector: {}
  policyTypes:
  - Egress
Allow all egress traffic
If you wish to permit all connections from every pod within a namespace, you can generate a policy explicitly granting all outgoing connections from the pods in that particular namespace.
---
apiVersion: networking.k8s.io/v1
kind: NetworkPolicy
metadata:
  name: allow-all-egress
spec:
  podSelector: {}
  egress:
  - {}
  policyTypes:
  - Egress
What are the challenges with Network policy
- It’s time-consuming.
- It’s highly complex, with multiple pods, services, and clusters. Defining policies that effectively control traffic within this complexity can be challenging.
- Operate at a very granular level, often requiring precise specifications for which pods can communicate with others. This level of detail can lead to complexity and the potential for misconfigurations.
- It’s very difficult to have full visibility into network traffic and dependencies, making it challenging to craft effective policies. This is even more challenging in large and distributed clusters.
ARMO Network Policy Overview
How does it work?
- ARMO Network Security monitors both inbound and outbound communication from each pod. The Network Security Policy tool enables the creation of Kubernetes Network Policies by capturing the allowed or denied traffic specified in the Ingress and Egress tabs. The user interface also provides real-time visibility into the applied policies.
- The network policy enters a 24-hour learning phase when a workload is first deployed or modified. During this phase, the system observes and records the workload’s network communication patterns. These are saved in a Custom Resource Definition (CRD).
You can view the stored network communication patterns in the networkneighborhoods CRD as follows:kubectl get networkneighborhoods -n <namespace> <workload-kind>-<workload-name> - If you want to re-trigger the learning phase, you can manually delete the existing networkneighborhoods resource and then restart the workload.
kubectl delete networkneighborhoods -n <namespace> <workload-kind>-<workload-name>On restart, the system will check for an networkneighborhoods resource: - If none exists, a new learning phase will begin. - If a completed networkneighborhoods already exists, no action will be taken.
Key Benefits:
- Gain immediate insights into the current communication between applications and services, facilitated by a visual topology map for easy identification of network traffic.
- ARMO's solution leverages eBPF to monitor both inbound and outbound communication from each pod and automatically generate Kubernetes Network Policies (KNPs) based on the application's behavior.
- Implement the principle of least privilege with KNPs that strictly adhere to an allow-only model, prohibiting any communication not explicitly permitted.
- Associate workloads with applied network policies, providing operators and developers insights into why pod communication may be allowed or restricted.
- Easily examine the network policies applied to a cluster for specific workloads, complete with detailed YAML information for in-depth analysis.
Access the feature
- Log into the ARMO platform.
- Navigate to the Network Policy page from the main menu.
Generate a Network policy
A network policy can be generated for one or more workloads. Therefore, you first need to choose
- Choose Cluster and Namespace from the drop-down menus.
- Select one or more workloads.
- Click on 'Generate policy'.
- Download the resulting file(s),
Statuses
-
Network Policy Applied: Indicates that at least one pod associated with the workload has a network policy applied.

-
Network Policy is Recommended: Indicates that none of the pods associated with the workload have a network policy applied.

-
Missing Runtime Info: Indicates the absence of essential runtime information for the workload, which is necessary to create a network policy. Learn how to resolve this.

-
Understanding the generated policy
The generated network policy will be displayed in a side-by-side view with your current network policy. This allows you to easily review and understand our suggested changes to your current configuration. The available tree view which you can toggle to is a graphic visualization of the desired state (i.e. suggested policy).
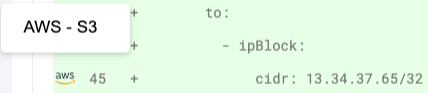
Additional Information on IP Addresses
Icons next to certain IP addresses provide extra details. Hover over these icons to quickly gain insights about the address
Updated 8 months ago