Onboard AWS Account
Overview & Objectives
Purpose:
This document describes how to onboard a single AWS account into ARMO Platform. After onboarding, ARMO will have visibility into the account’s resources, enable governance / compliance policies, monitor for risks, detect anomalies, etc.
Prerequisites
| Item | Requirement |
|---|---|
| ARMO Platform | You have an admin or Manager access to ARMO Platform |
| AWS account access | You have administrative or IAM privileges in the AWS account you intend to onboard. |
| IAM permissions | Ability to create IAM roles, attach policies, set trust relationships. |
High-Level Flow
- In the ARMO platform: initiate “Add AWS Account” flow (not Organization).
- In the AWS account: create an IAM role (e.g. Armoreadonlyrole) with the correct trust policy and permissions.
- In ARMO: enter the role ARN, and configure settings.
- Let ARMO assume the role to ingest data (assets, compliance, alerts).
- Verify data ingestion, alerts, and resource visibility.
Detailed Step-by-Step Onboarding
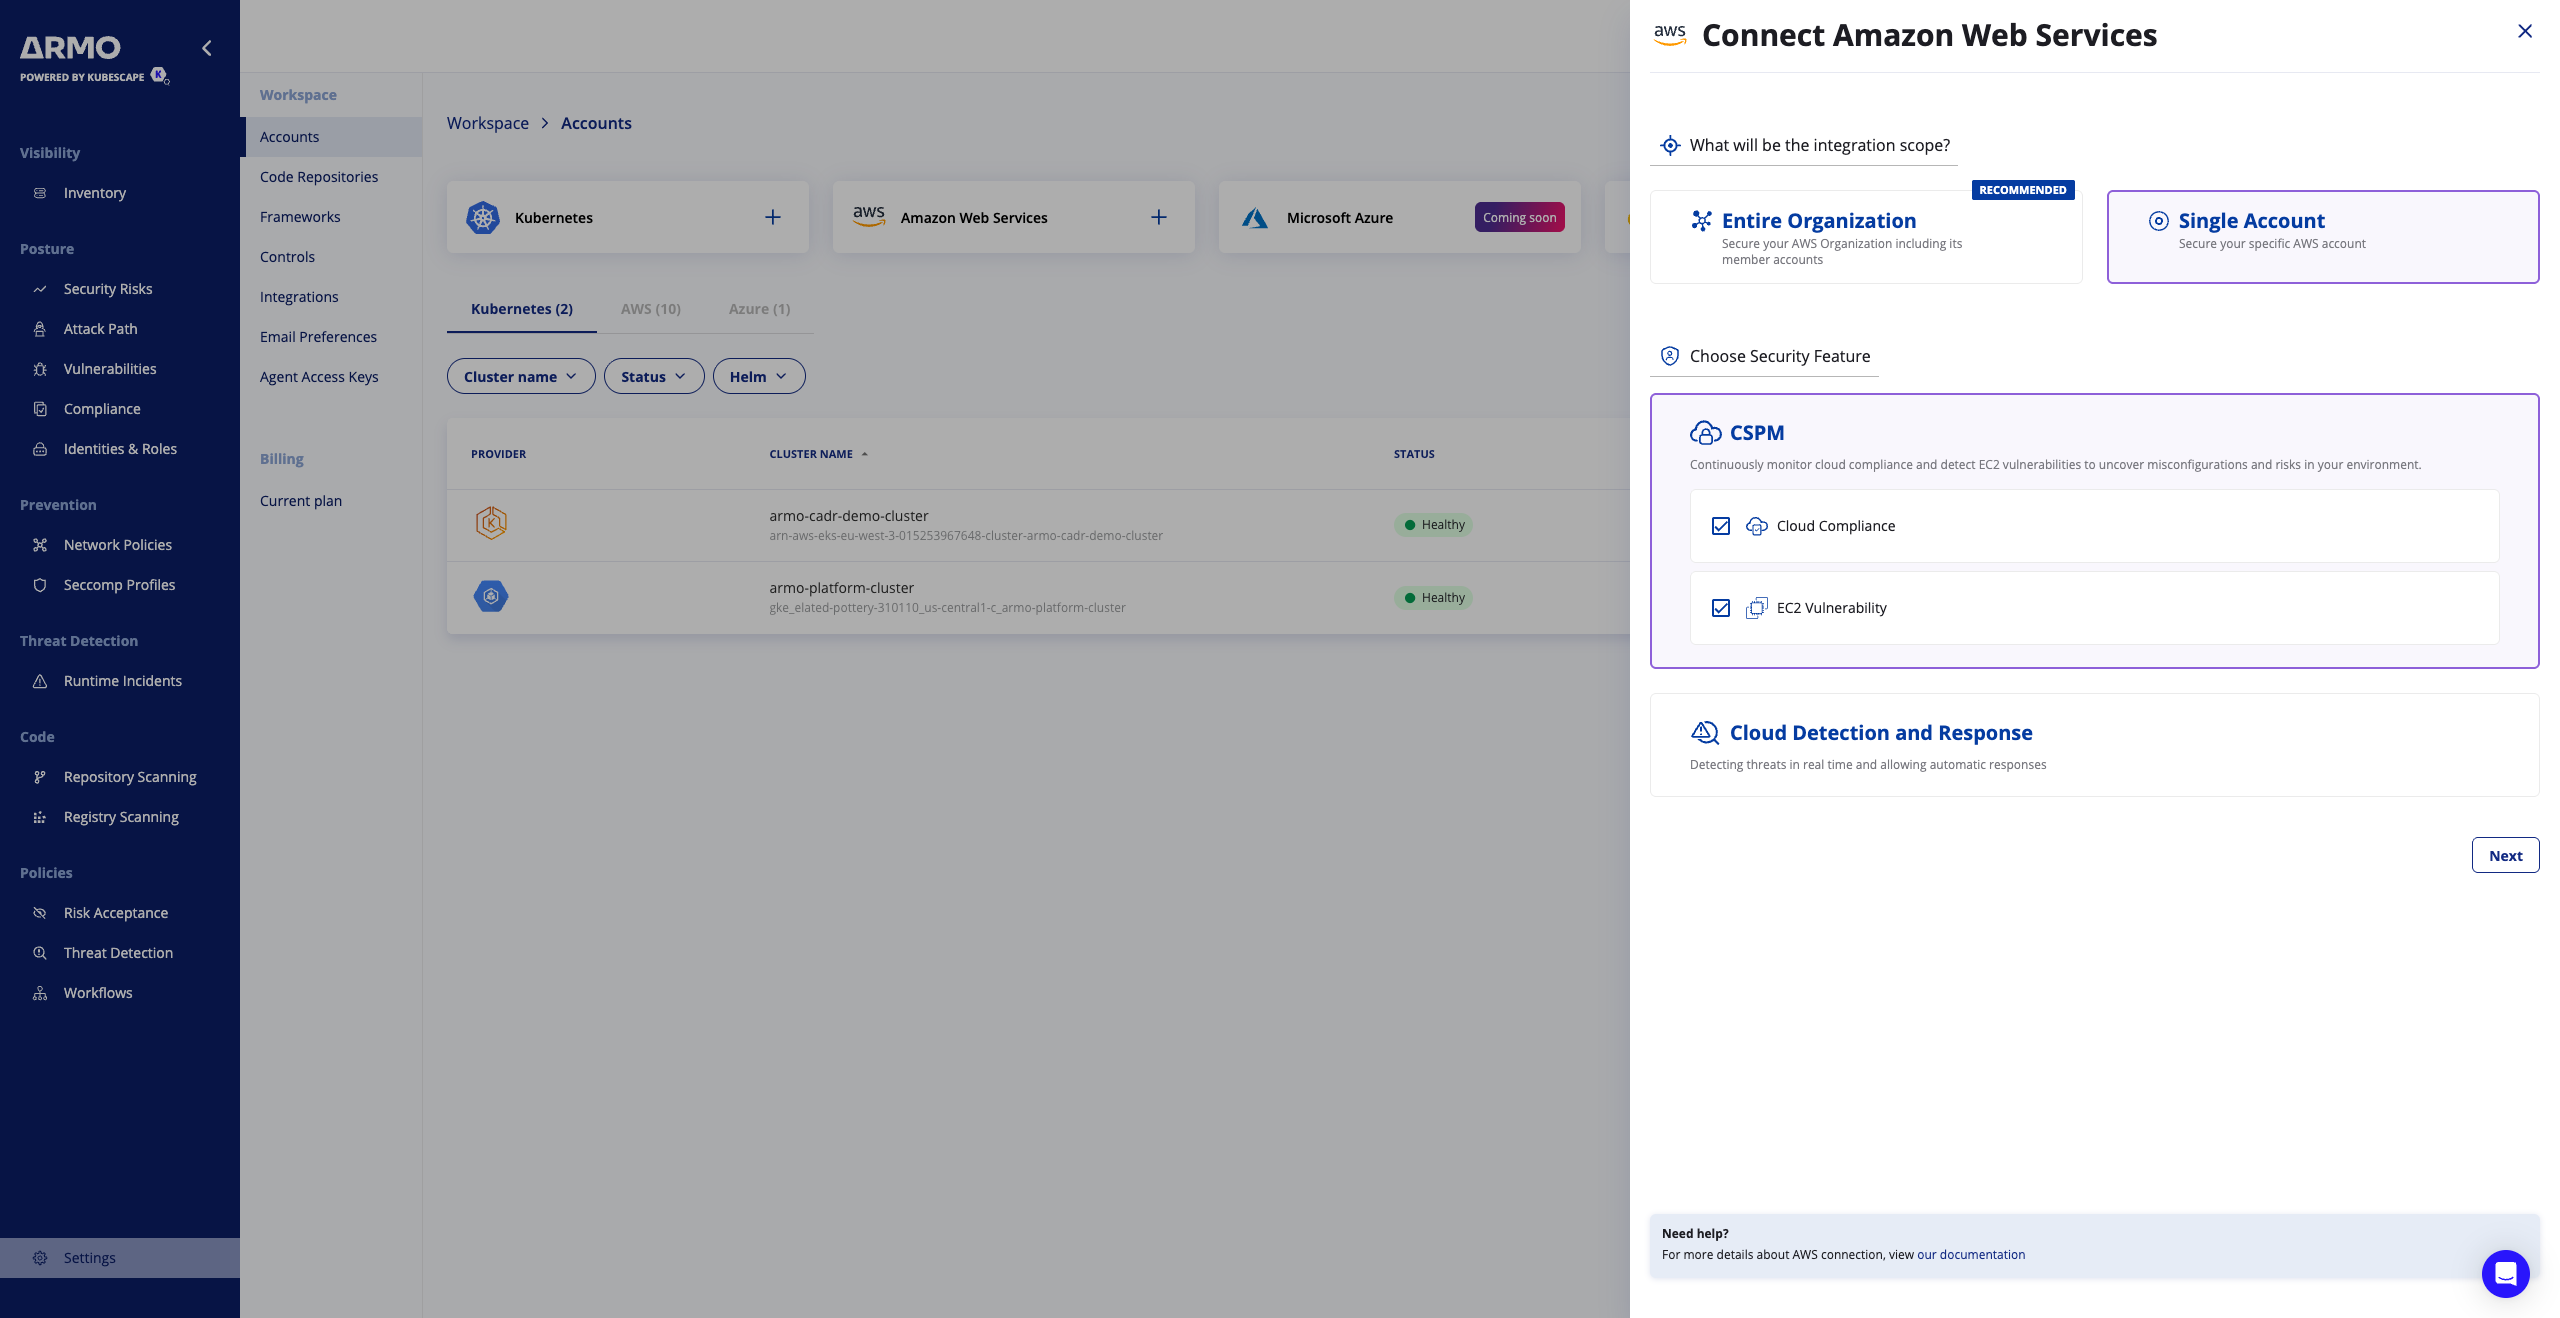
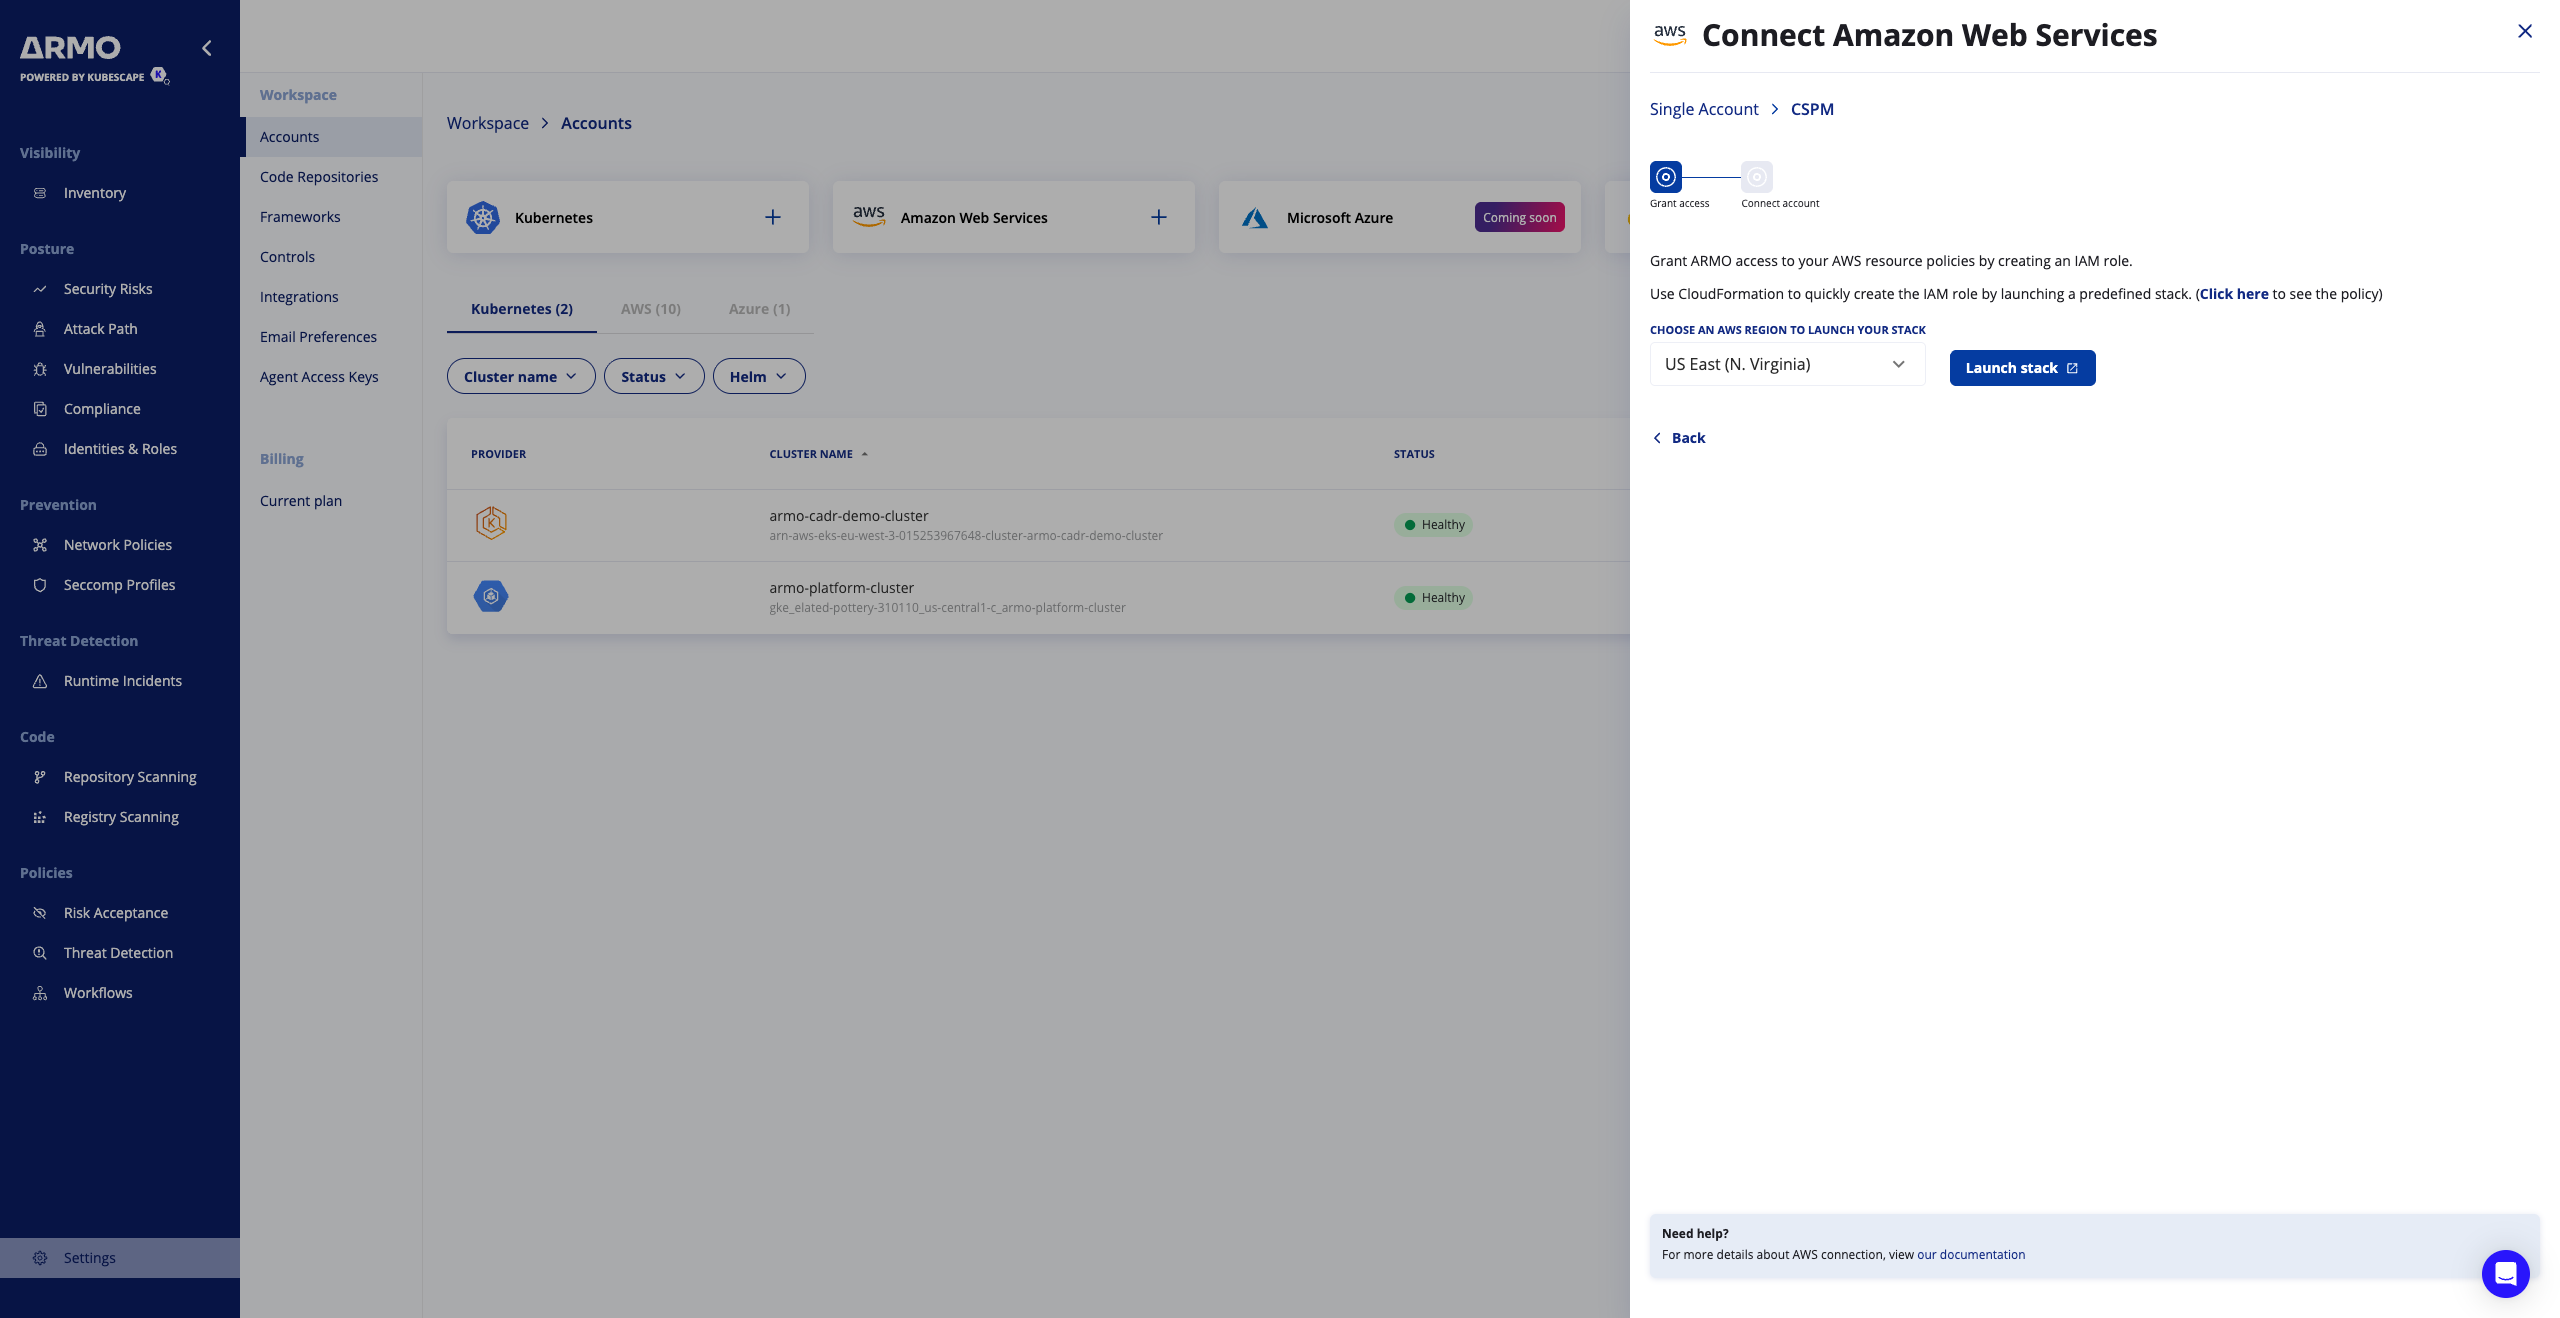
Step 1: Initiate Onboarding in ARMO Platform
- Log in to the ARMO Platform and navigate to Settings → Accounts → AWS
- Click the Amazon Web Services card → Click Single Account → Click Next
- Choose an AWS Region to launch your stack, and click Launch Stack
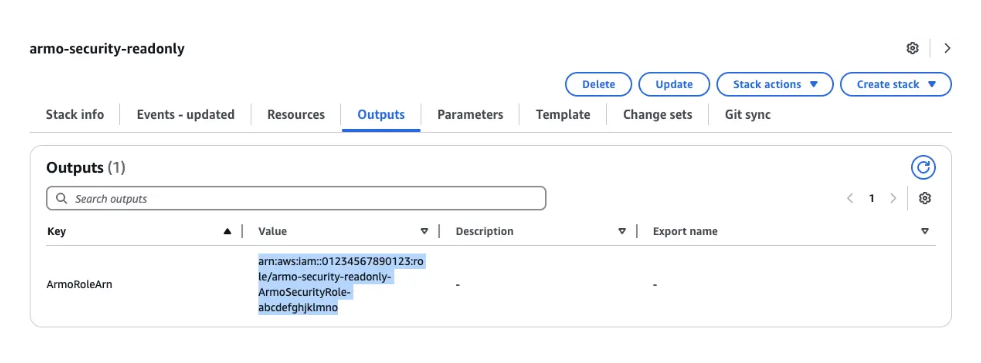
Step 2: Create the IAM Role in the AWS Account
In the target AWS account (the one being onboarded):
- Scroll to the bottom and Mark the «I acknowledge that AWS CloudFormation might create IAM resources with custom names»
- Click “Create stack”
- Navigate to the Outputs tabs (The RoleARN may take up to a minute to appear)
- Copy the RoleARN value

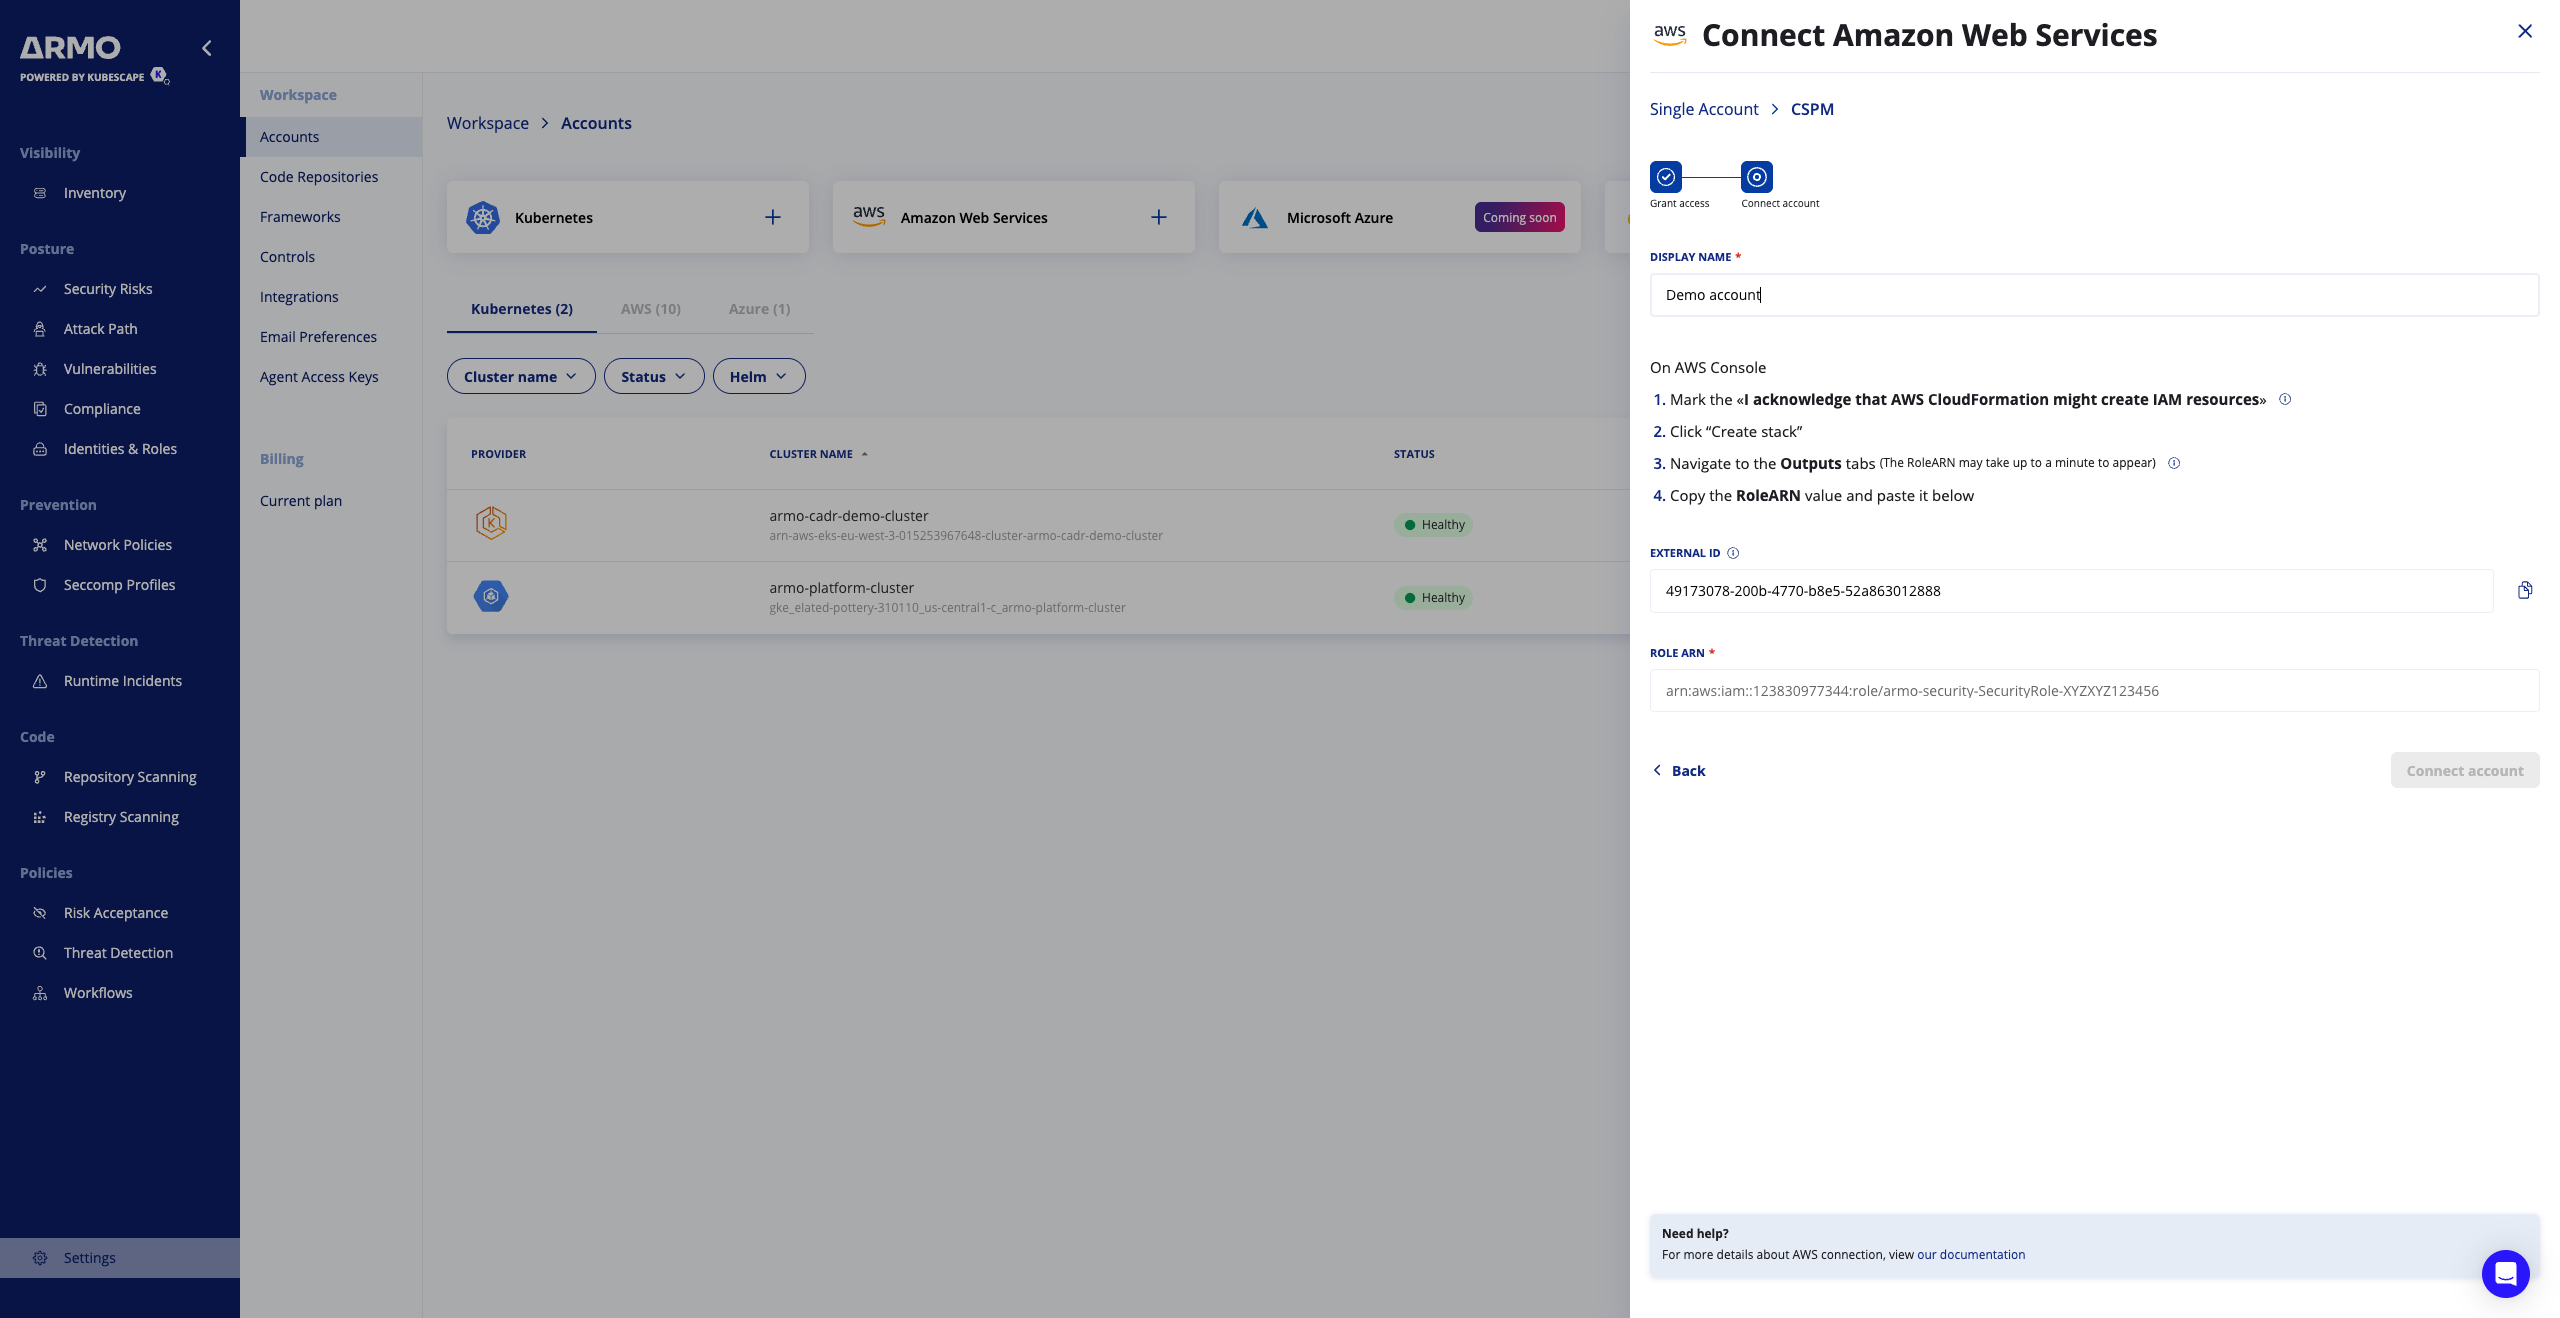
Step 3: Configure the Role in ARMO Platform
- Return to the ARMO platform where you initiated the “Connect AWS Account” flow.
- Enter the Display name
- Enter the Role ARN of the IAM role you created (e.g. arn:aws:iam::<account_id>:role/armo-scan-role).
- Click Connect account
- If ARMO shows “Congratulations”, then the onboarding is successful.
Step 4: Confirm Data Ingestion & Monitoring
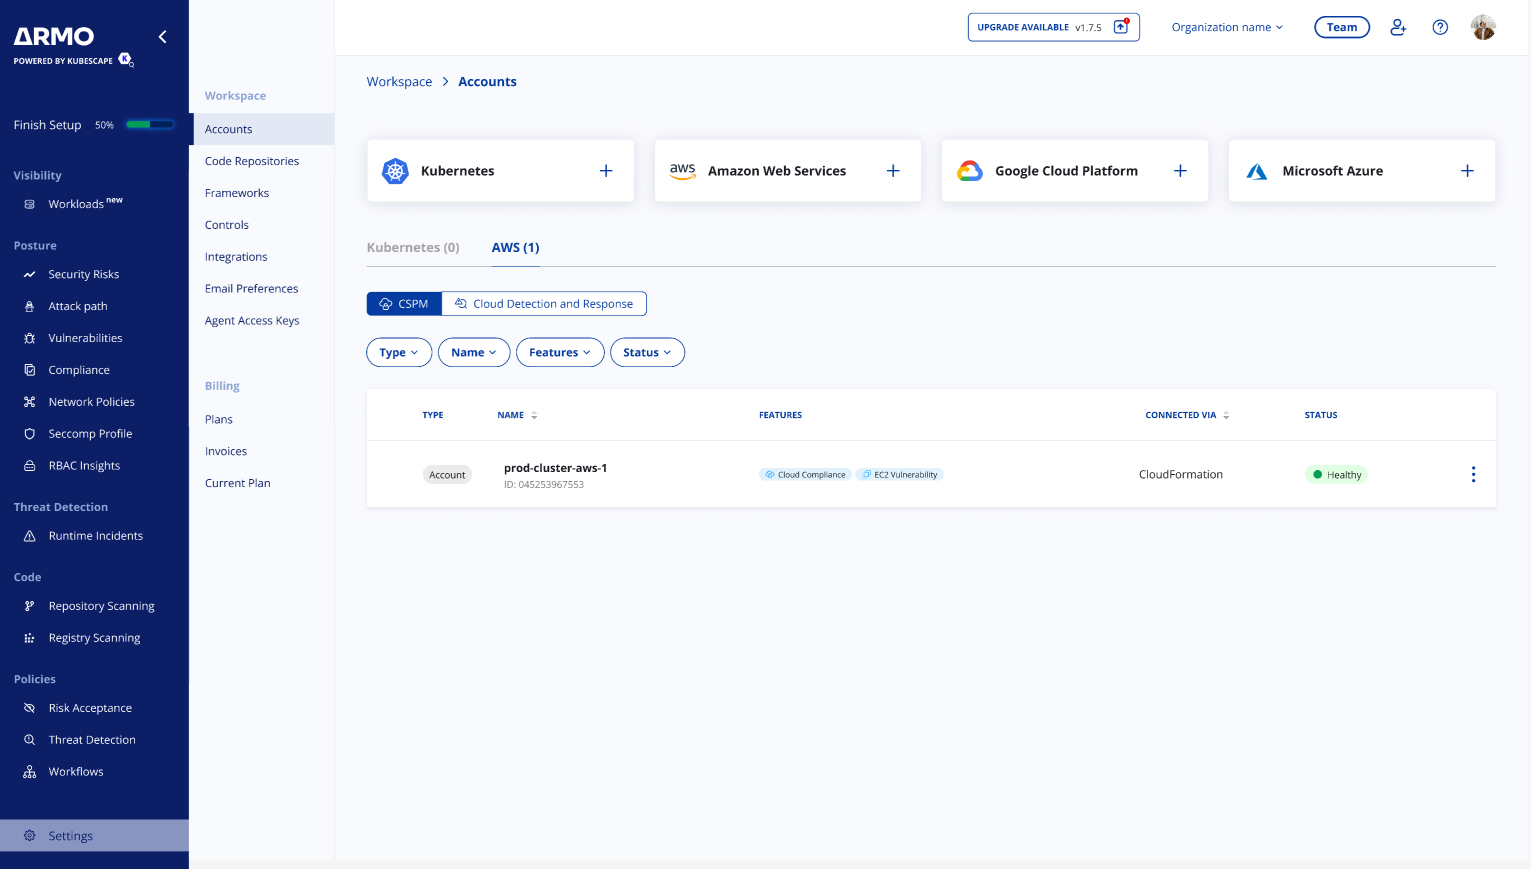
- In ARMO, check that the account appears in the Settings / Accounts / AWS table.
- Check that ARMO is showing the scanning results on the Compliance > Cloud or Vulnerabilities > Host pages (depending to the feature selection)
- Validate data freshness (e.g. that ARMO is syncing on its schedule).
Troubleshooting
| Issue | Likely Cause | Suggested Fix |
|---|---|---|
| ARMO cannot assume role / “access denied” | Trust policy is wrong (principal, external ID, missing sts:AssumeRole) | Review trust JSON, ensure correct ARMO principal and correct external ID |
| Role ARN entered incorrectly in ARMO | Typo or wrong account / role name | Copy-paste the exact ARN from AWS IAM console |
Updated 8 months ago
Did this page help you?