Onboard Azure Subscription
Overview & Objectives
Purpose:
This document outlines the process for onboarding a single Azure subscription into the ARMO Platform. After onboarding, ARMO will have visibility into the account’s resources, enable governance/compliance policies, and monitor for risks
Prerequisites
| Item | Requirement |
|---|---|
| ARMO Platform | You have an admin or Manager access to the ARMO Platform |
| Azure Global Administrator | You have administrative or IAM privileges in the Azure subscription you intend to onboard. |
| Owner | Owner role in the target subscription(s). |
High level onboarding flow
The Azure onboarding process in ARMO establishes secure, read-only access so ARMO can continuously analyze your cloud configuration, compliance posture, and activity logs.
- Get your Azure Subscription ID
- Create an Azure App Registration
- Grant Microsoft Graph API permissions
- Generate a Client Secret
- Create a Custom Azure Role for CSPM
- Assign roles to the application
- Connect subscription
[ARMO Platform]
│
▼
[Start Onboarding Wizard]
│
▼
[Azure Portal]
├── Register ARMO App
├── Create Secret
├── Create custom role
└── Assign Roles to the application
│
▼
[Return to ARMO → Enter Credentials]
│
▼
[Validation + Discovery]
│
▼
[Continuous Scanning & Compliance Insights]
Detailed Step-by-Step Onboarding
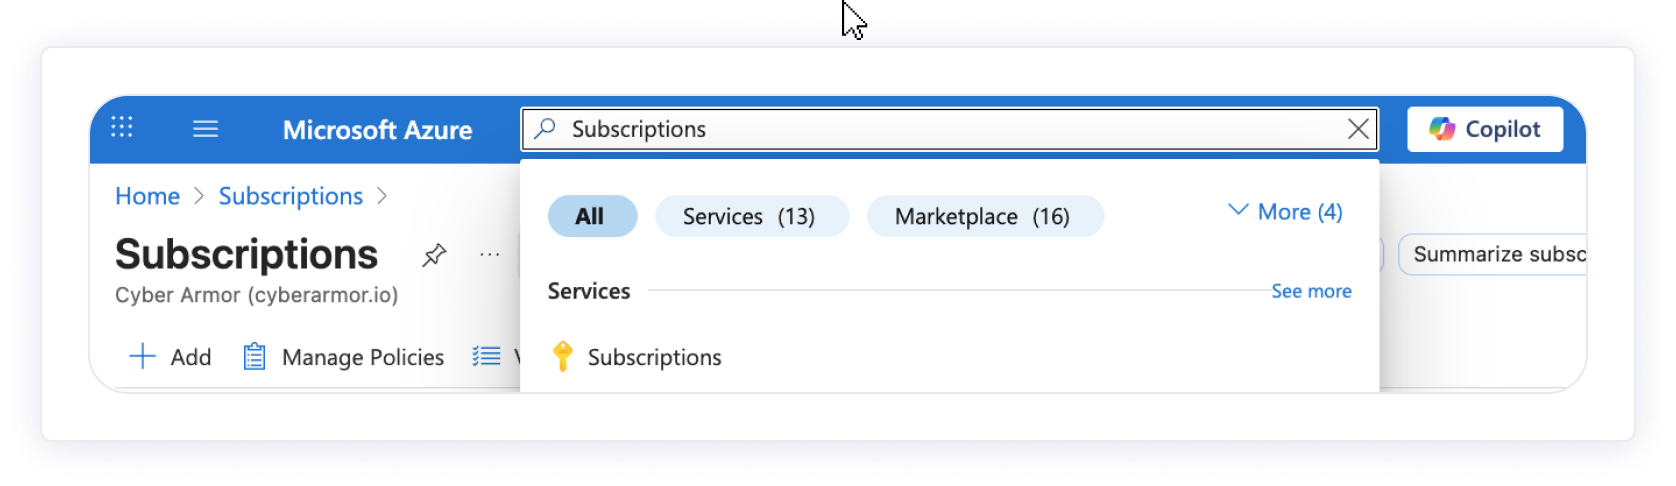
1. Get the subscription id
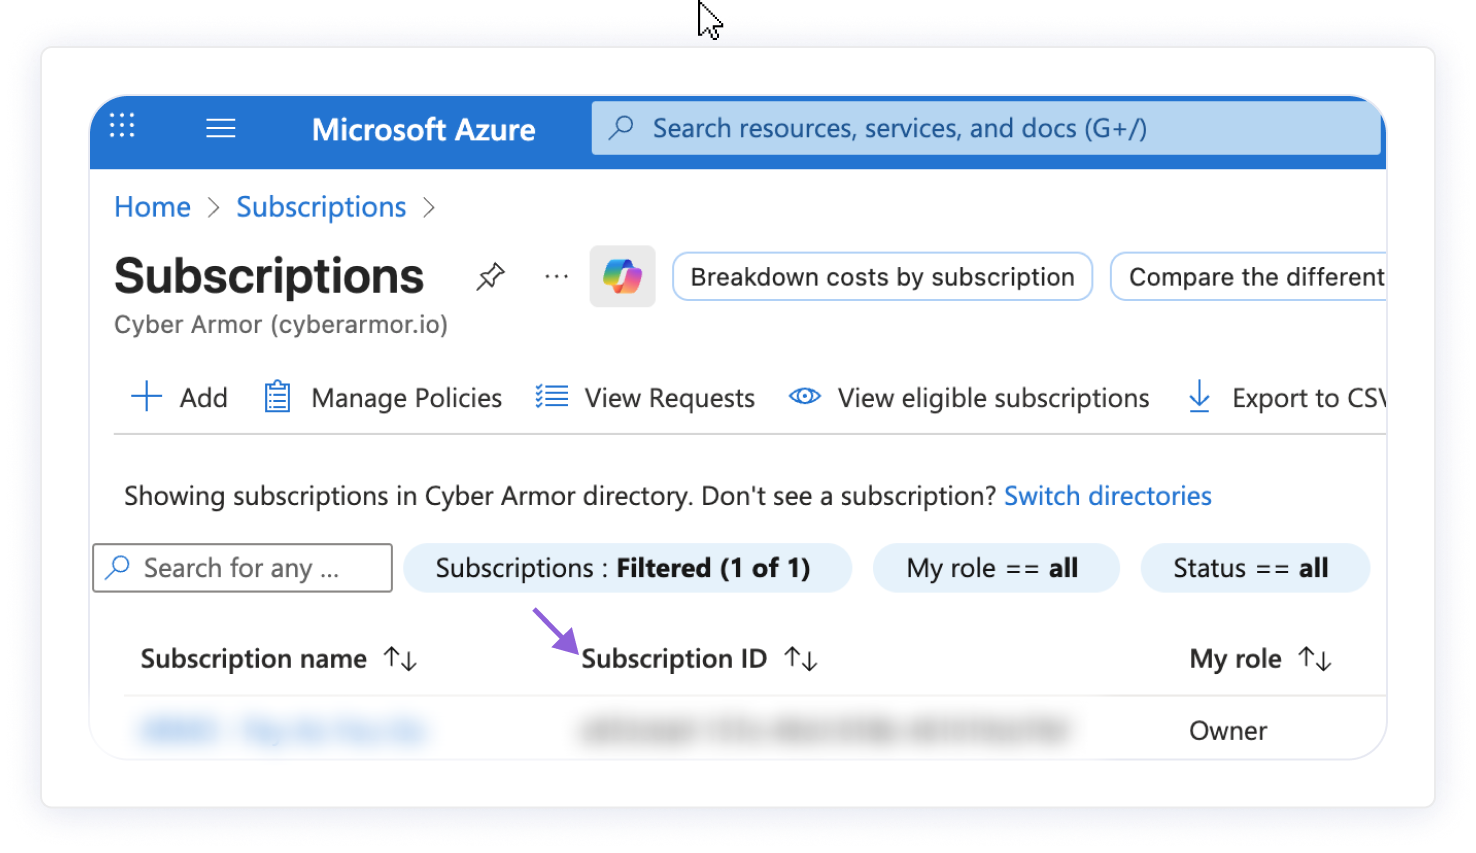
- Go to Azure portal and search for Subscriptions.
- Locate and copy your Subscription ID.
2. Go to ARMO Platform
-
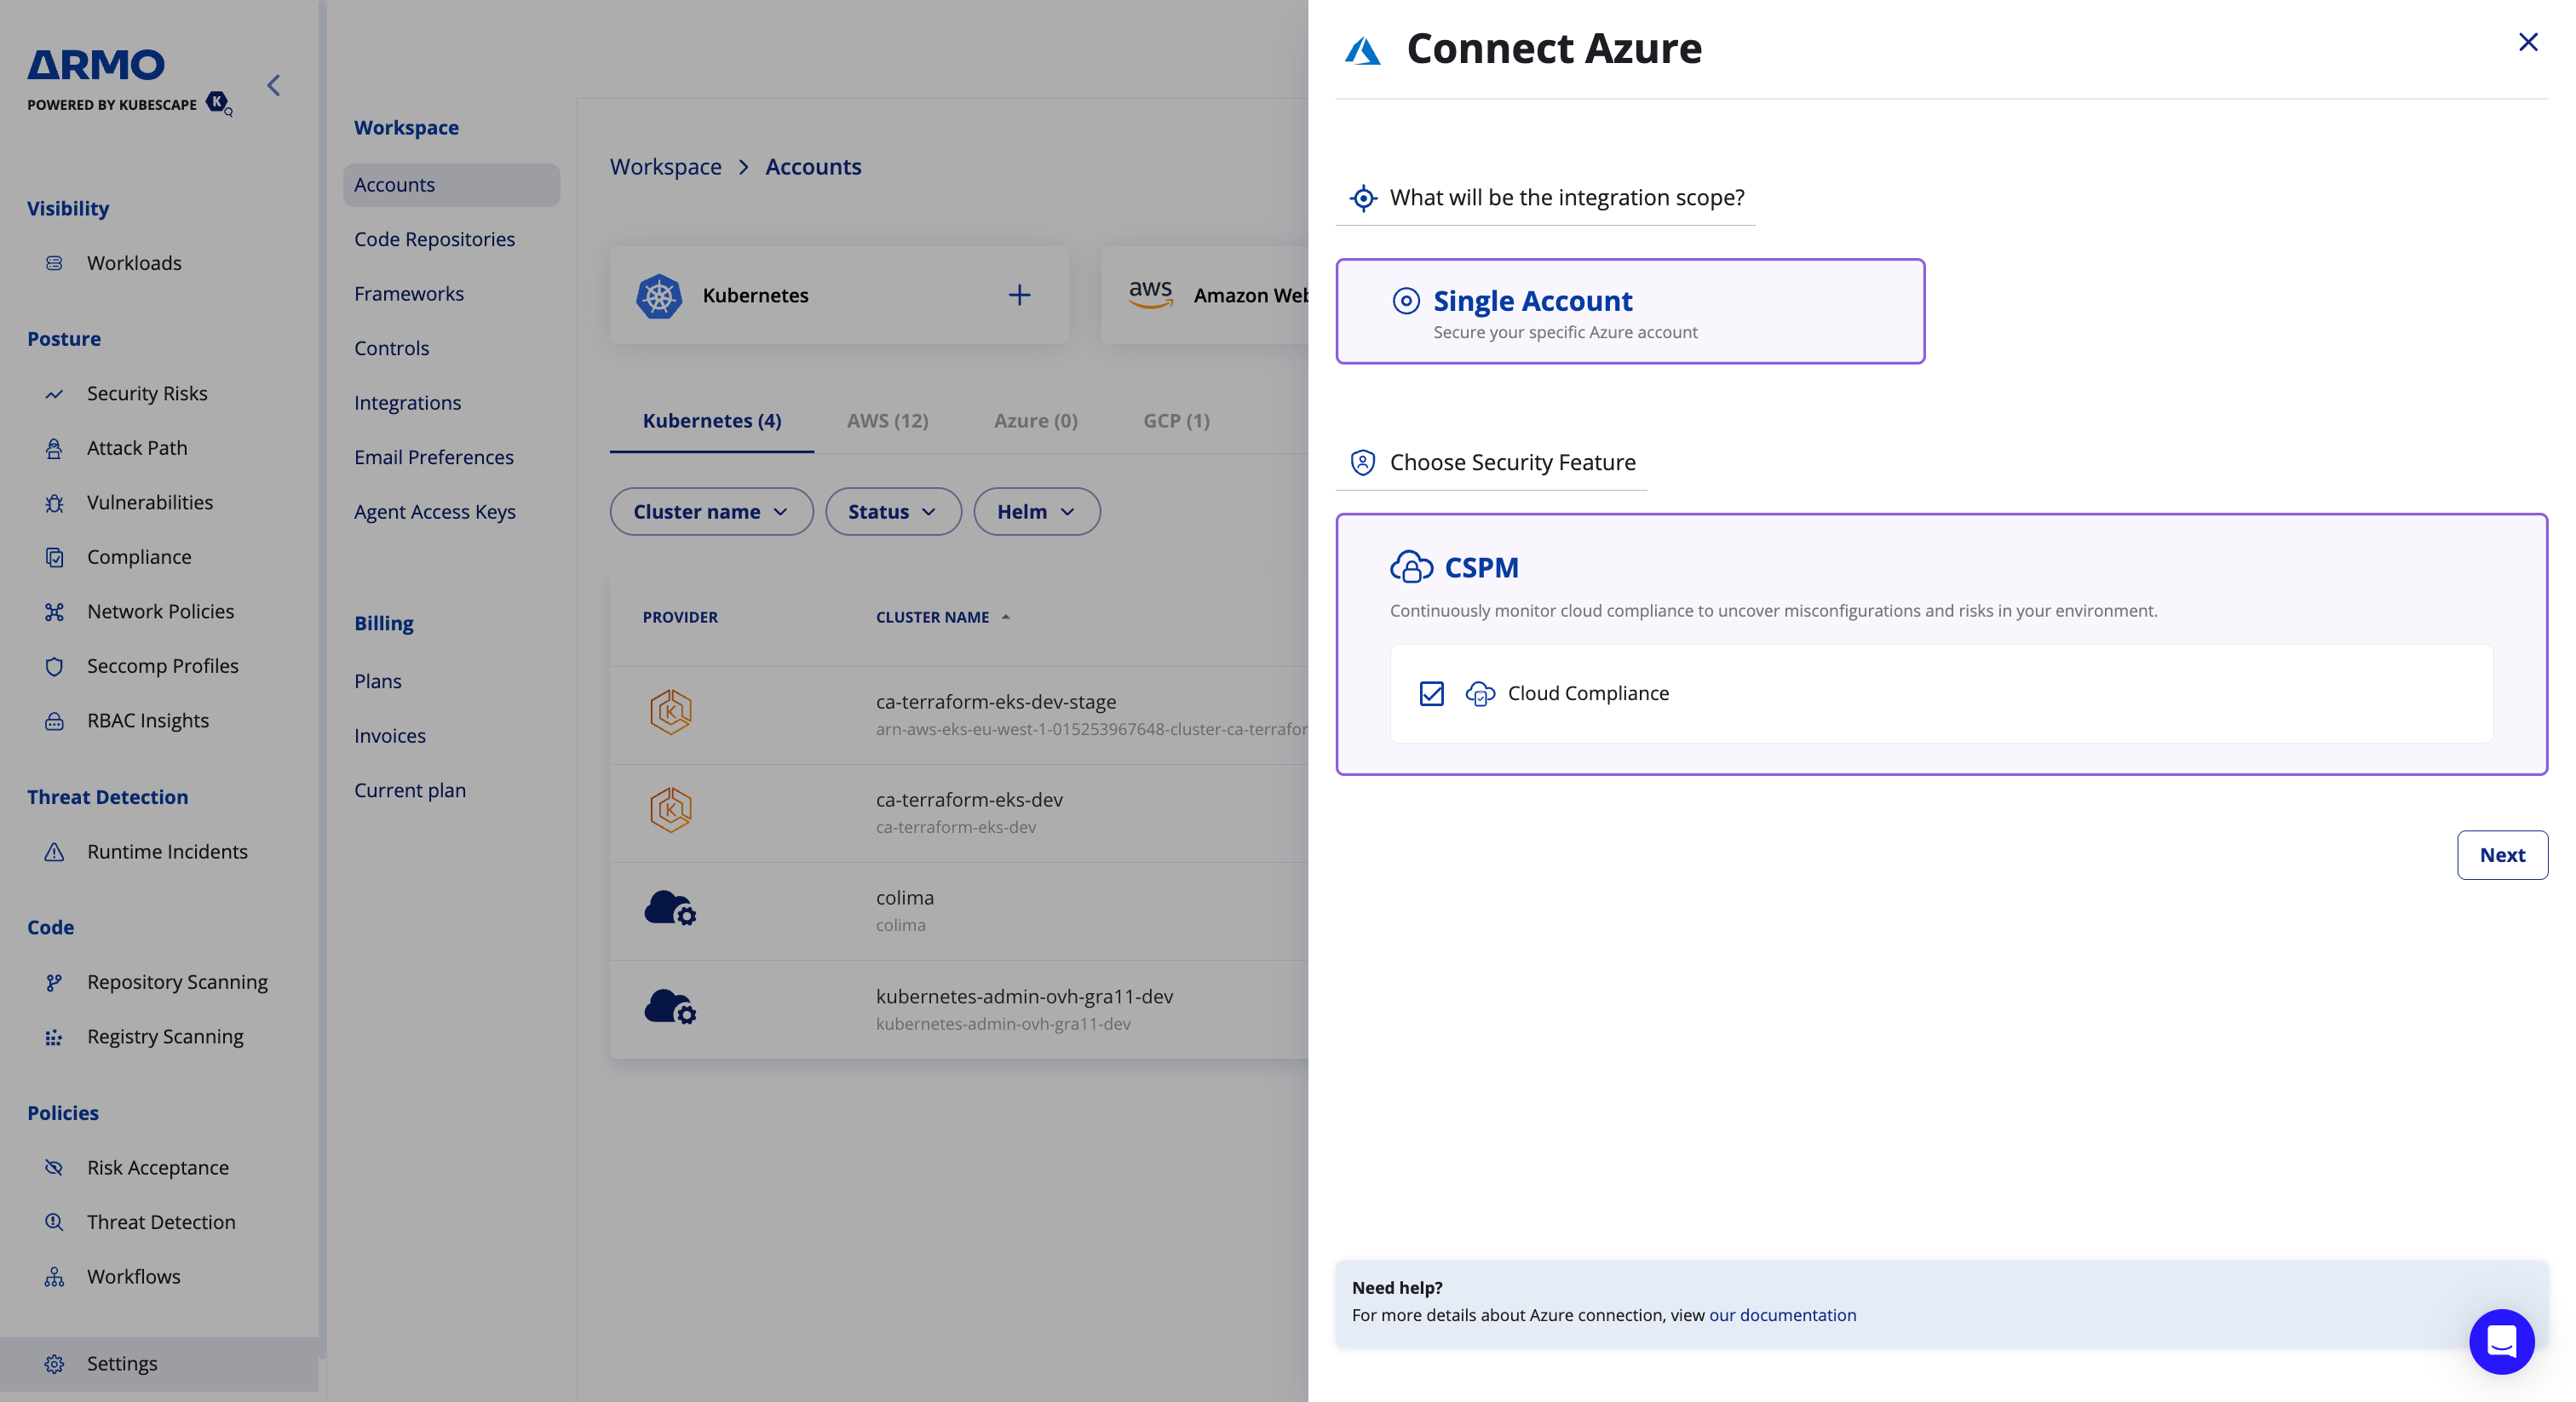
Go to Settings --> Accounts
-
Click on the Microsoft Azure card and click Next
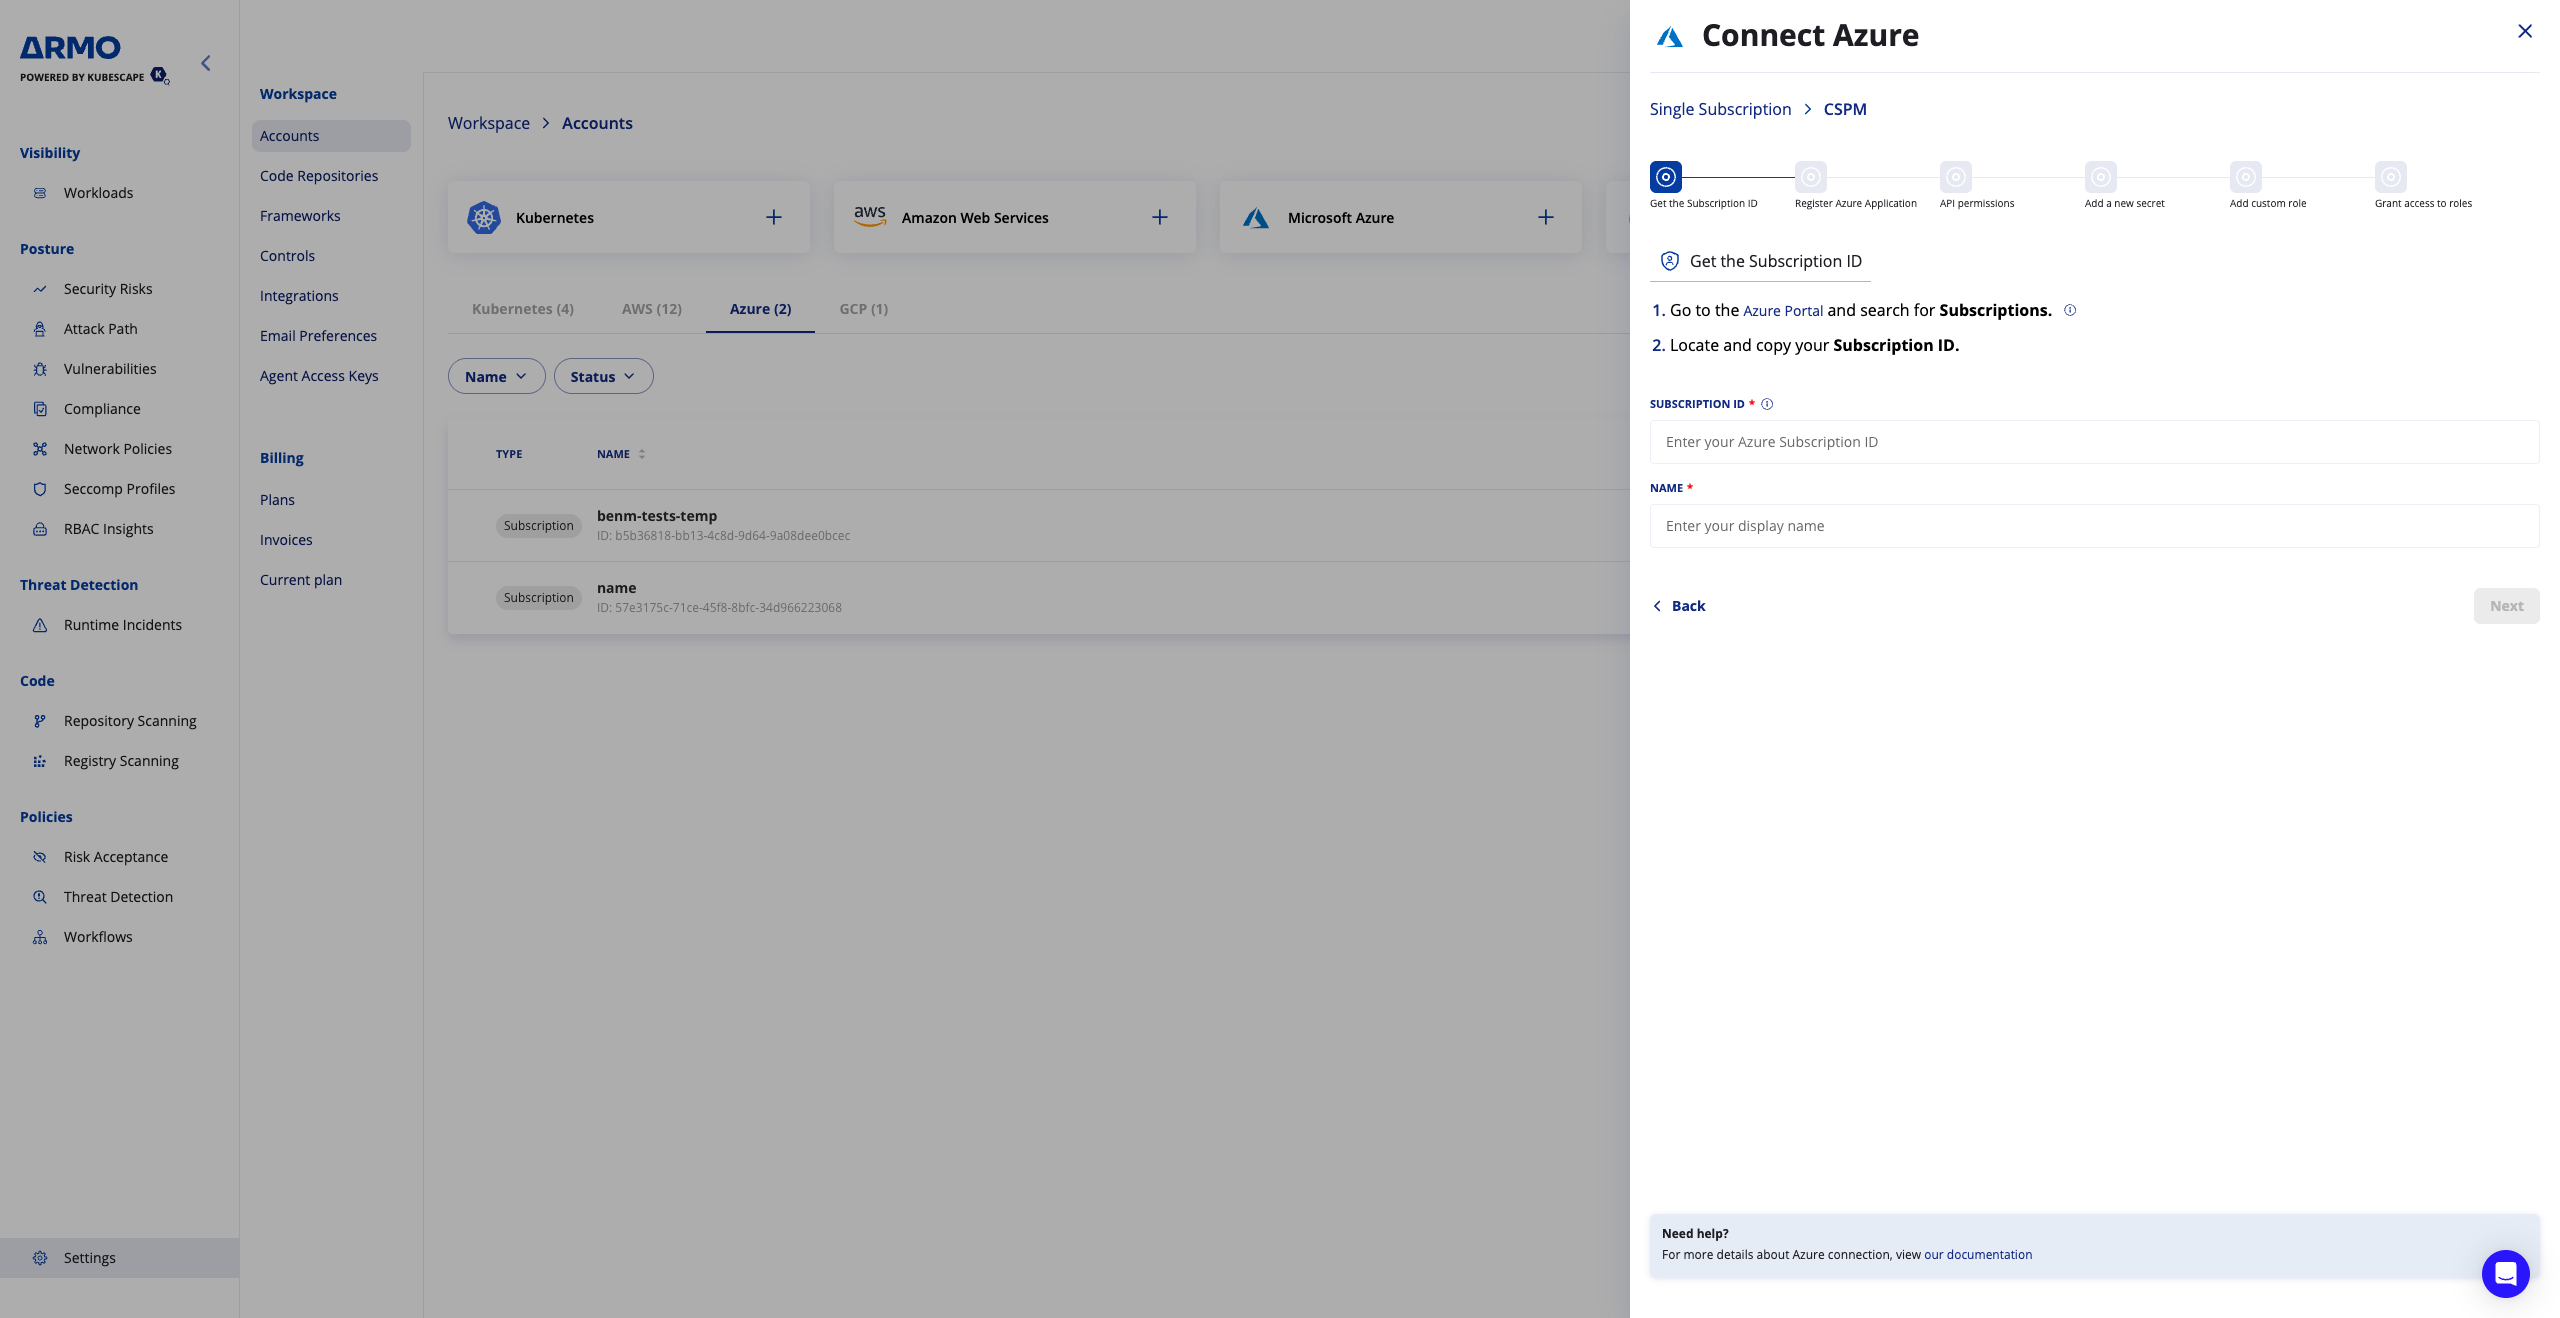
- Enter the Microsoft subscription id
- Enter a display name
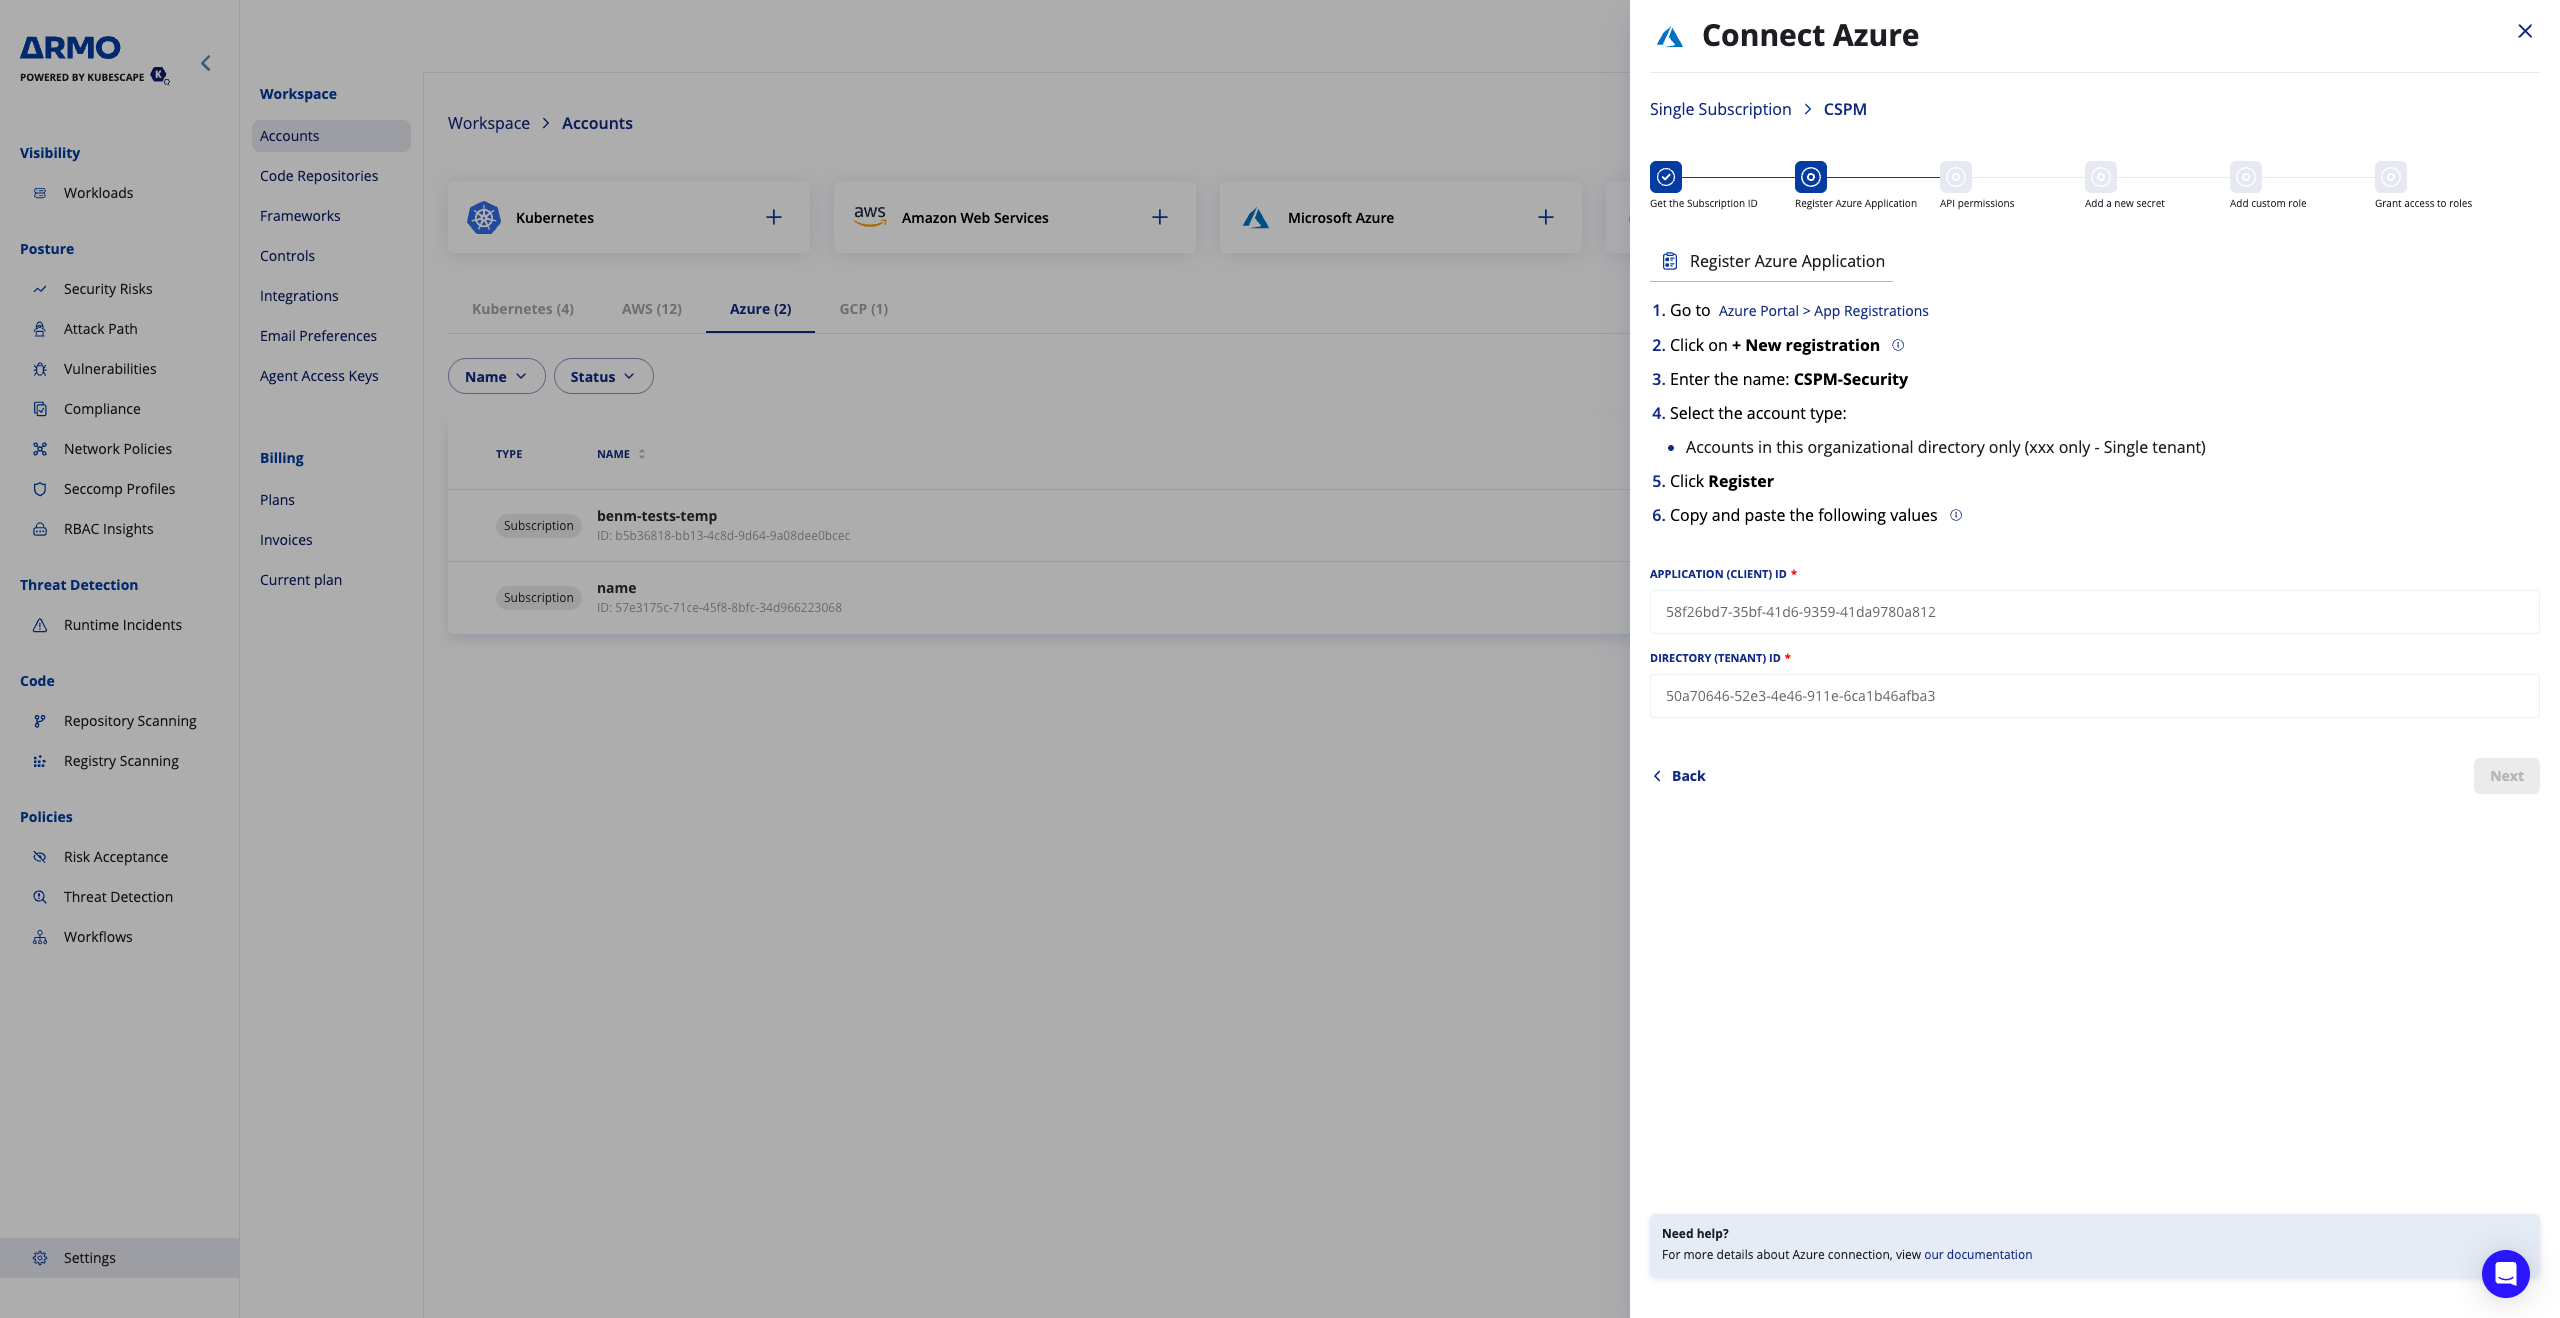
3. Register ARMO as an Azure Application
-
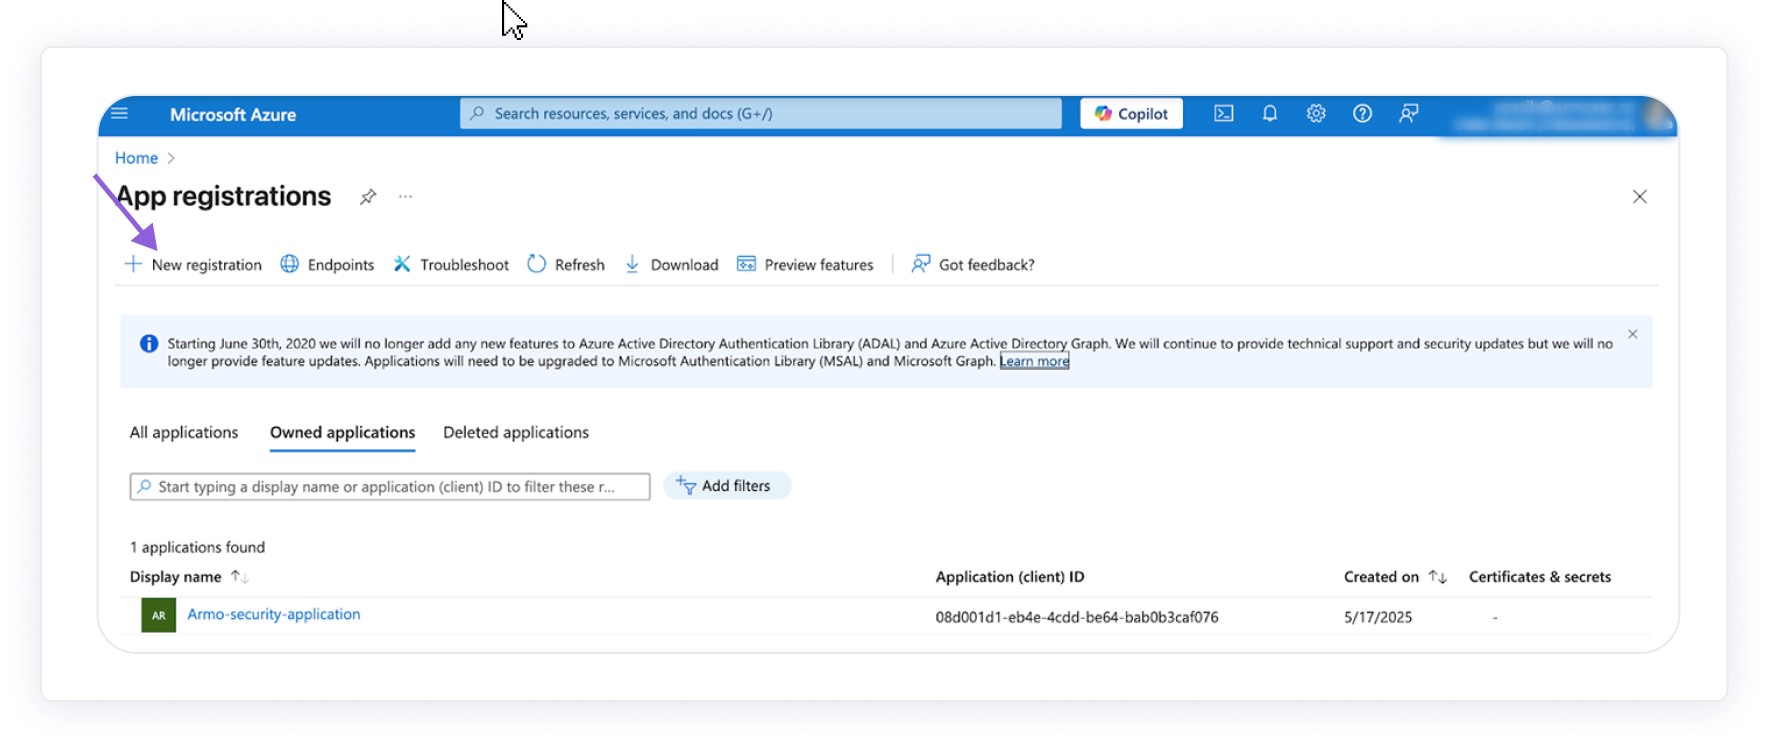
Navigate to Azure Portal → App registrations.
-
Click + New registration.
-
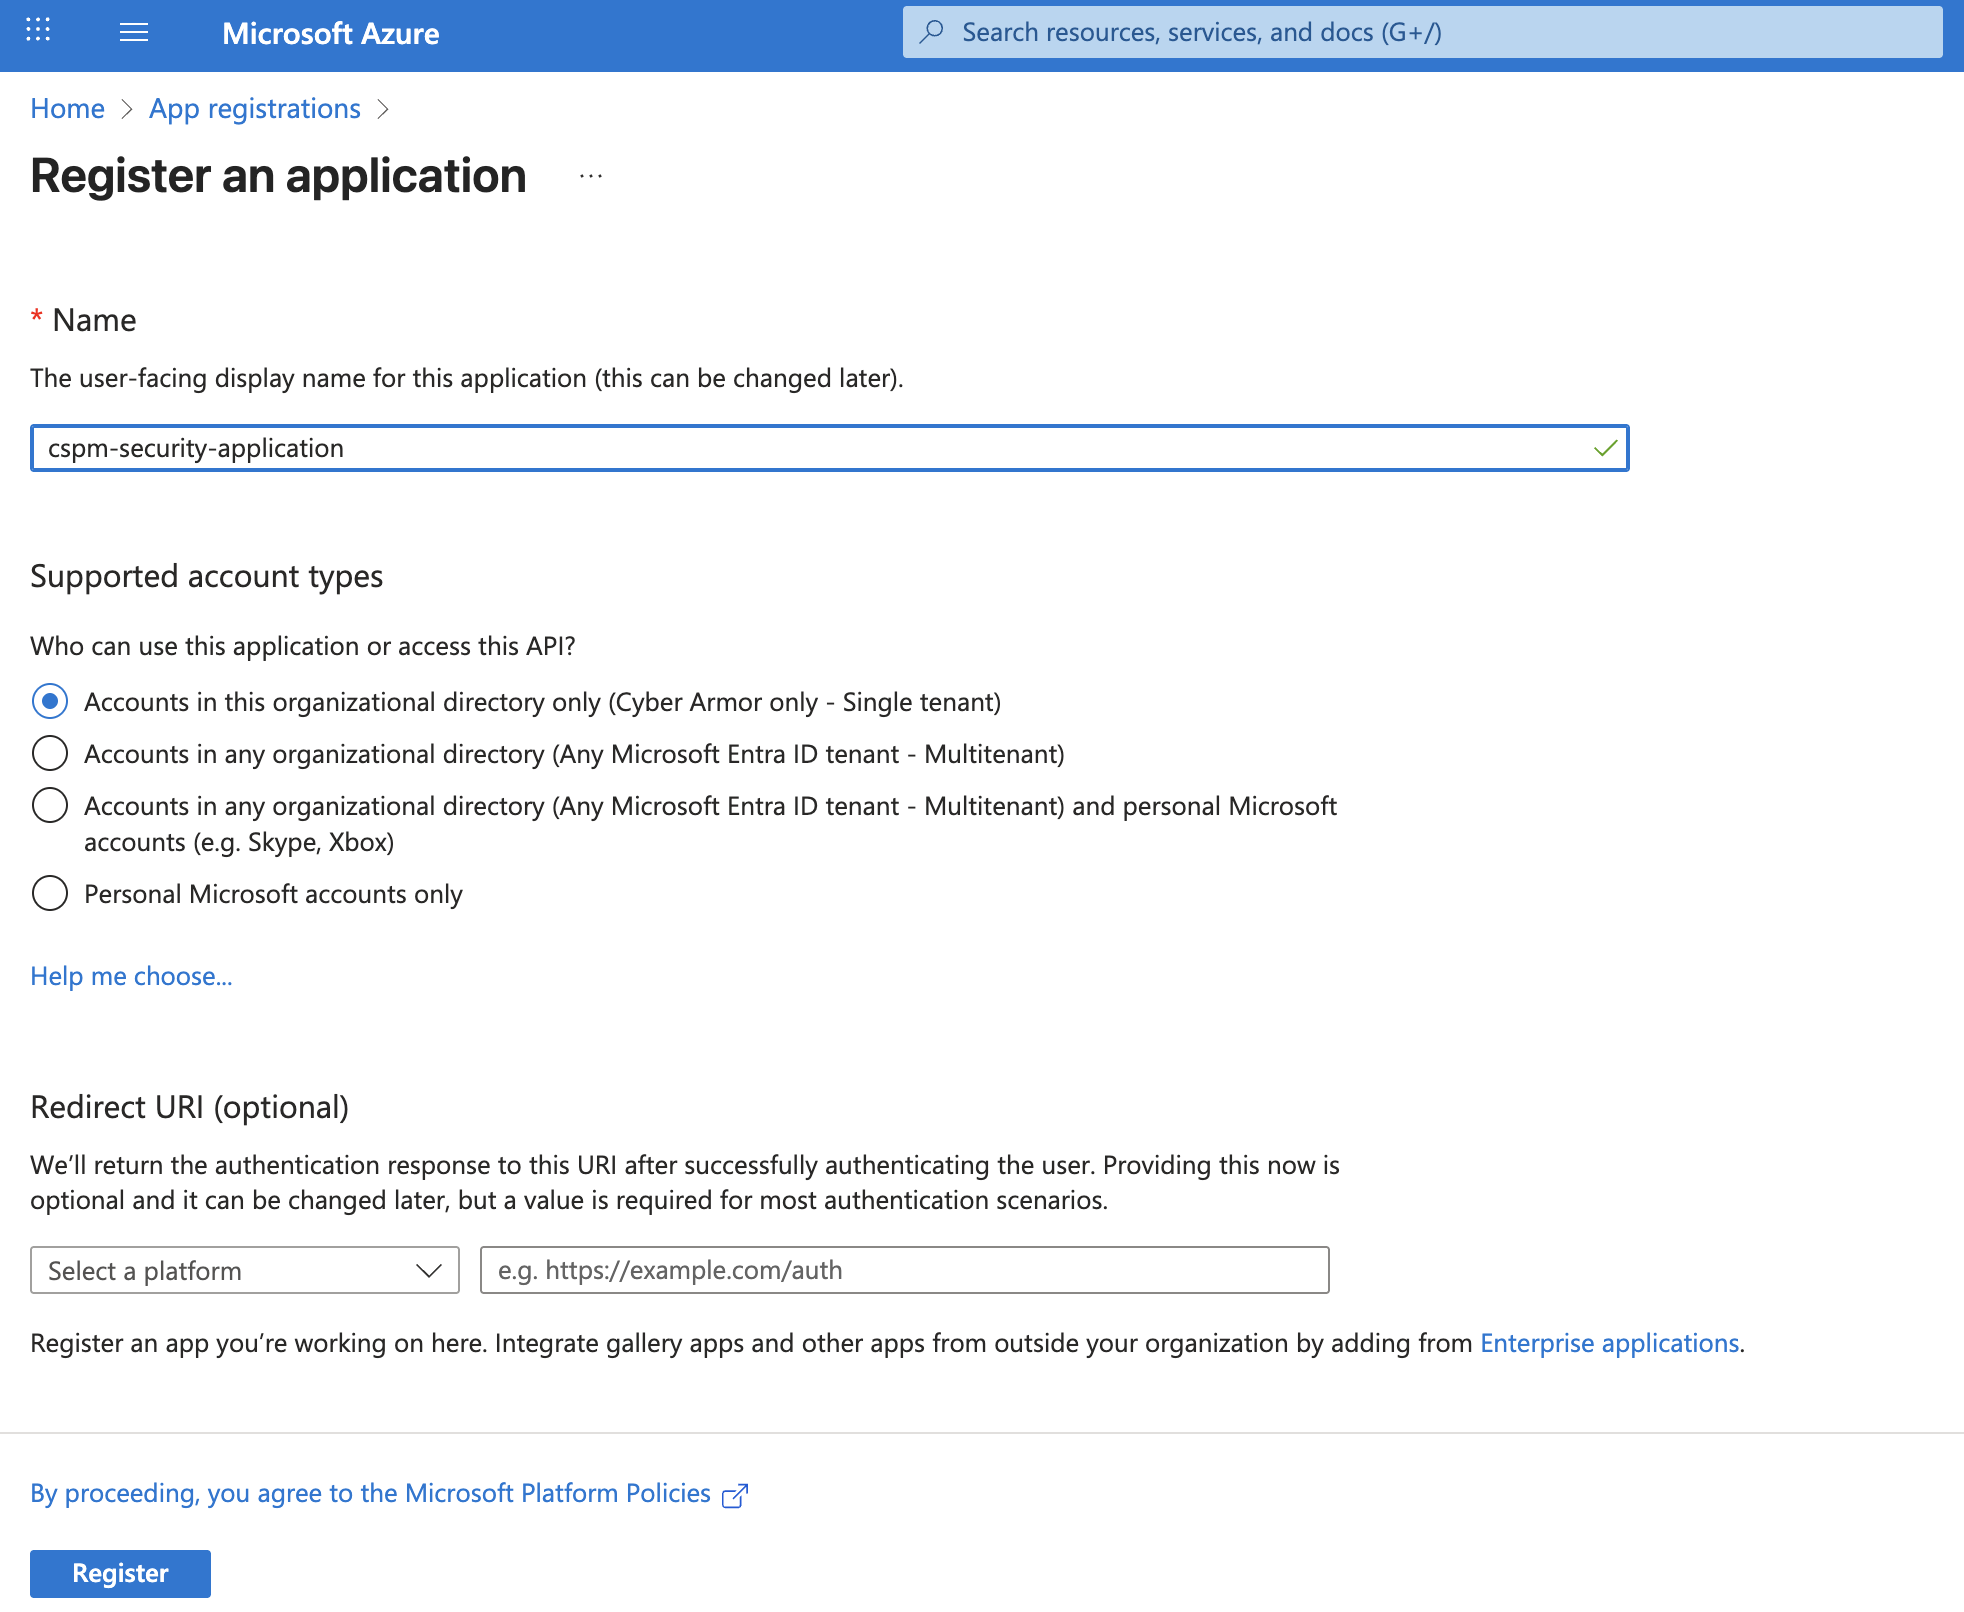
Enter the name: cspm-security-application
-
Select the supported account type:
- Accounts in this organizational directory only – for a single tenant setup.
-
Click Register.
-
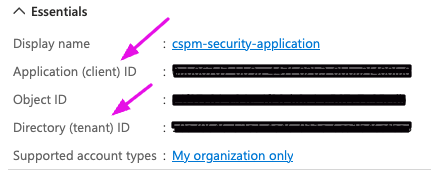
Copy the following values
- Application (client) ID and paste it in the ARMO connection wizard
- Directory (tenant) ID and paste it in the ARMO connection wizard
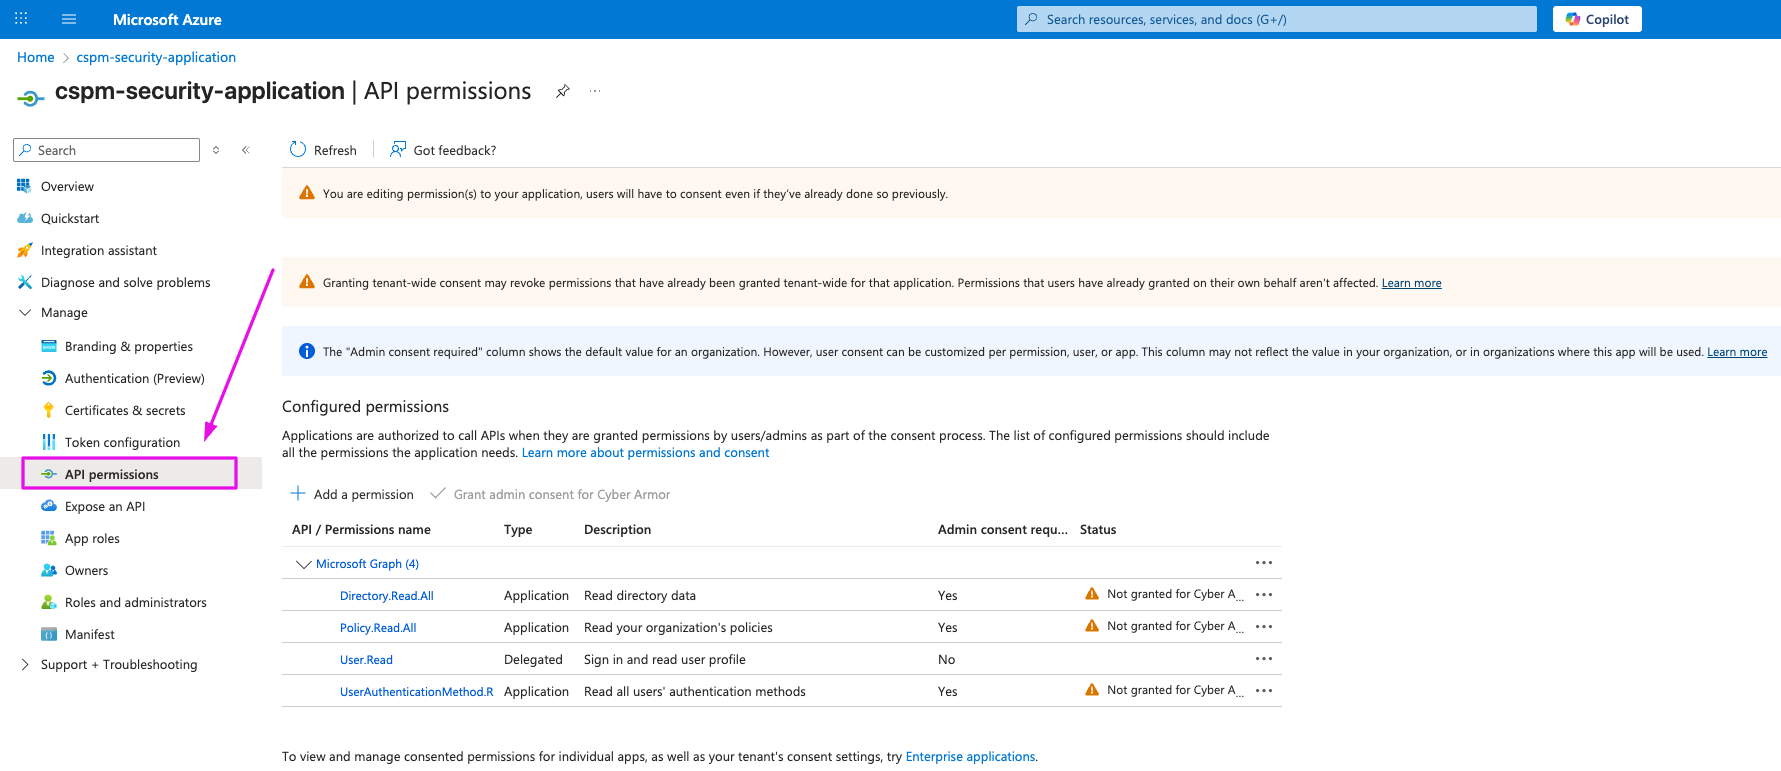
4. Grant Microsoft Graph API Permissions
- Navigate to Azure Portal → App registrations.
- Open cspm-security-application
- Click API permissions
- Click + Add a permission
- Select Microsoft Graph
- Select Application permissions
- Search and add:
- Directory.Read.All
- Policy.Read.All
- UserAuthenticationMethod.Read.All
- Click Add permissions
- Click Grant admin consent
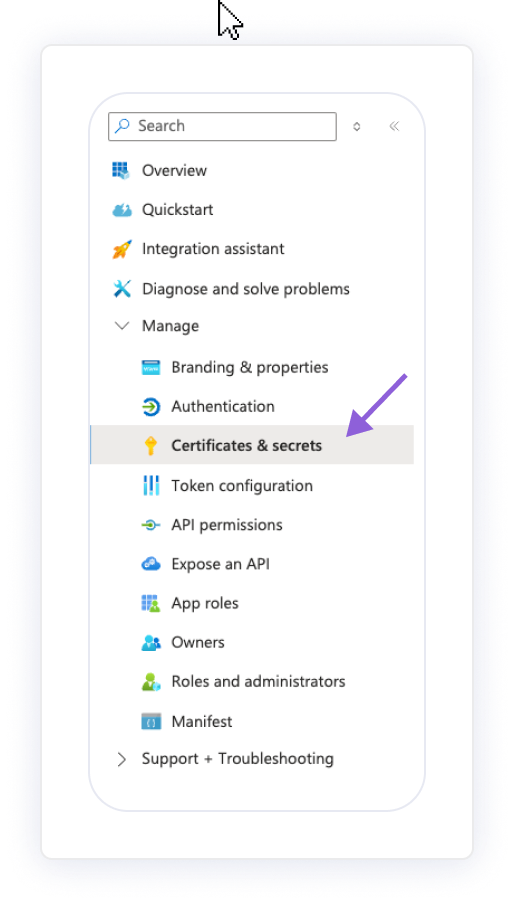
5. Add a New Secret
-
Open the newly created application and go to Certificates & secrets.
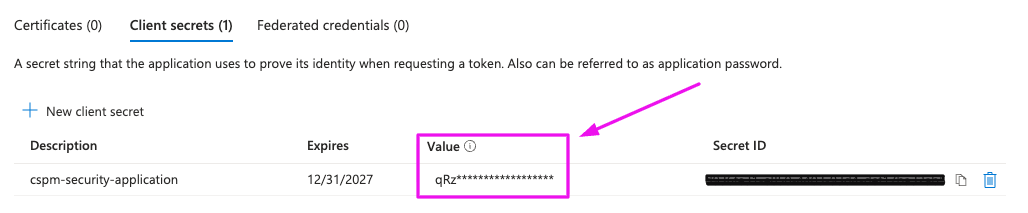
-
Under Client secrets, click + New client secret.
-
Add a description (e.g: cspm-security-application) and set expiration to 730 days (24 months).
-
Click Add.
-
Copy the Secret Value and paste it in the ARMO connection wizard
Client secret values cannot be viewed, except for immediately after creation. Be sure to save the secret when created before leaving the page.
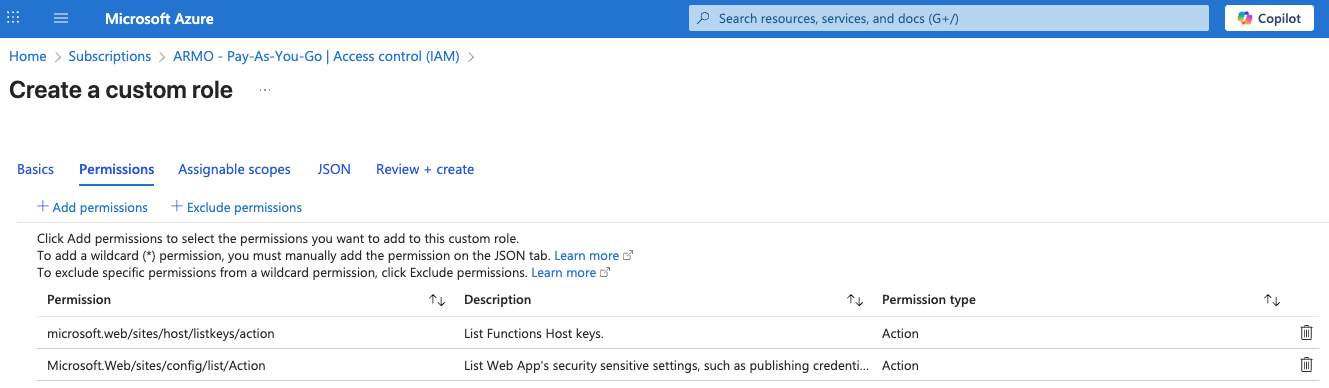
6. Create an Azure Custom Role
This role grants ARMO secure read-only access to required Azure services.
- In the Azure Portal, go to Subscriptions.
- Select your subscription
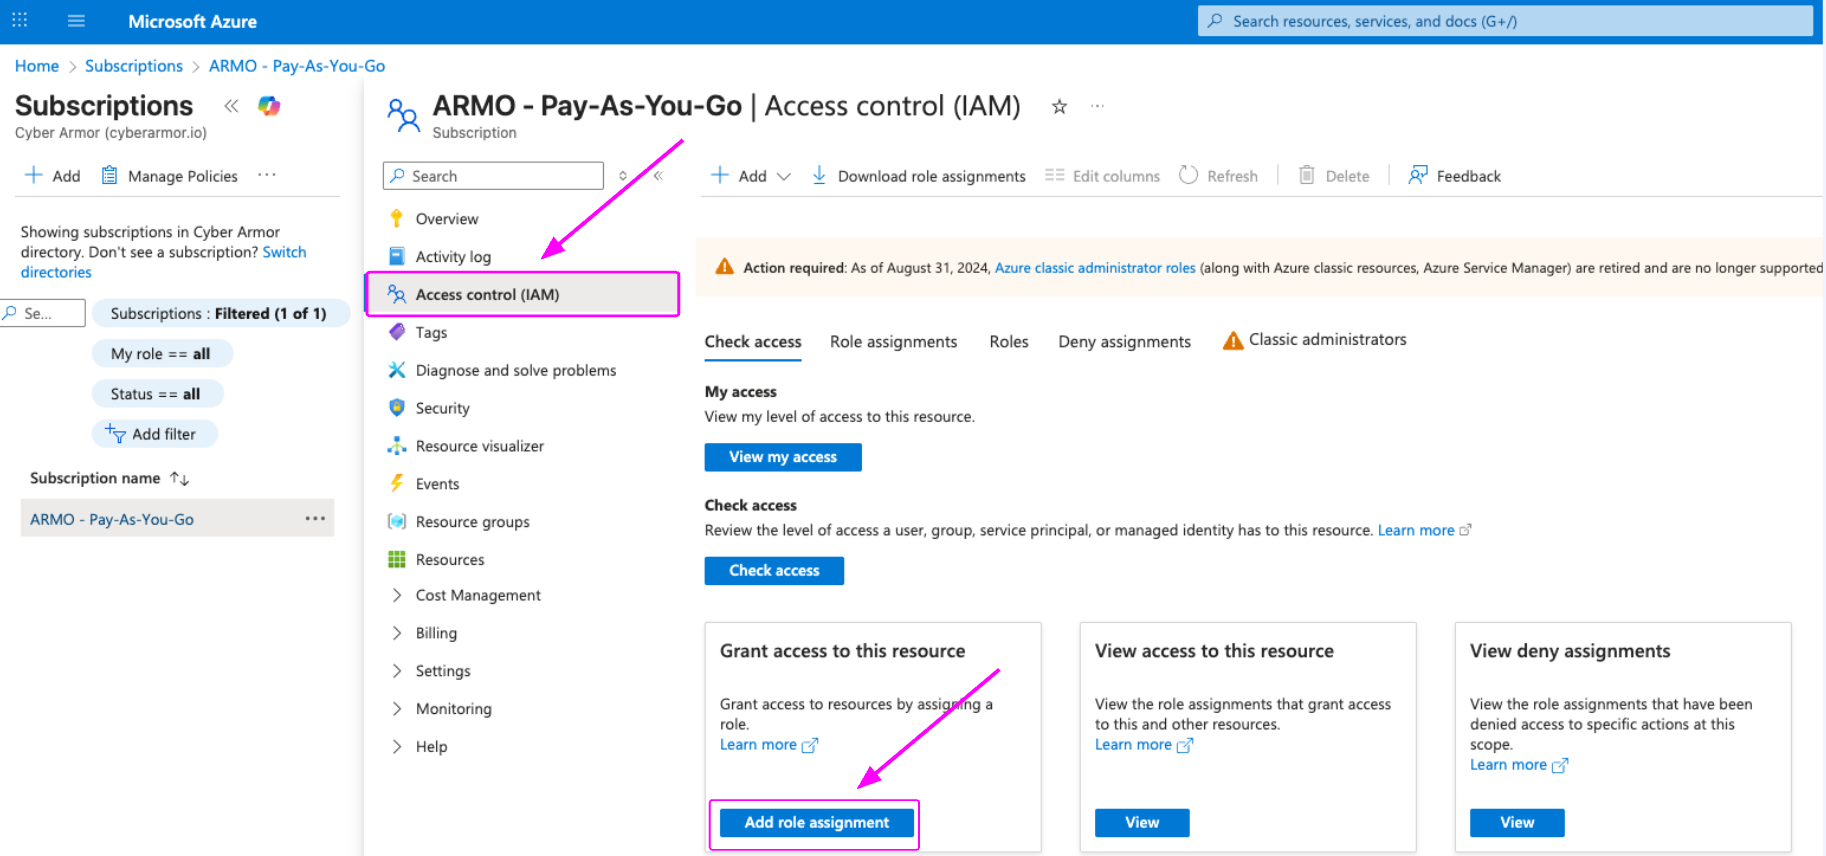
- In the subscription menu, select Access control (IAM).
- Click + Add → Add custom role
- Enter Role name: CSPM Access
- Select Start from scratch → Next
- Click Add permissions
- Search and add: Microsoft.Web/sites/host/listkeys/action
- Click Add permissions again and add: Microsoft.Web/sites/config/list/Action
- Click Review + Create
- Click Create
7. Assign Roles to the Application
-
In the Azure Portal, go to Subscriptions.
-
Select your subscription
-
In the subscription menu, select Access control (IAM).
-
Click + Add → Add role assignment.
-
Assign the custom CSPM role
- Role: CSPM Access
- Assign access to: Default
- Members: Search and select the application "cspm-security-application"
- Click Review + assign
-
Repeat the same process for:
- Reader
- Security Reader
-
Your application should now have three roles:
- CSPM Access
- Reader
- Security Reader
-
Click Connect account
After Onboarding
Once your Azure environment is connected:
- ARMO automatically discovers Azure resources and begins scanning for compliance and configuration issues.
- Connected subscriptions appear under Settings → Accounts → Azure(tab) in the ARMO Platform.
- Compliance results typically appear within 60 minutes in the Compliance section (Cloud tab)