CDR Policies
CDR policies help security teams detect and track threats across cloud infrastructure environments.
Use CDR policies to tailor which runtime activity is monitored, including: which cloud environments are monitored, which detection rules are applied, and how detections are surfeced. Policies can be configured to report incidents for review, send alerts to external systems, open tickets in integrated ticketing tools,
A CDR policy can be tailored according to:
- Scope - the cloud accounts and regions the policy monitors.
- Rules - the cloud threat behaviors or security events the policy detects.
- Actions and notifications - how detections are handled, including incident classification triggers, dashboard reporting, alerts, and ticket creation for integrated systems.
When to use CDR policies
Use CDR policies when you want to monitor cloud infrastructure environments for suspicious activity, risky changes, or security events.
CDR policies are useful when you need tailored detection coverage across cloud accounts, regions, teams, or sensitivity levels.
Common use cases include:
- Monitoring production cloud accounts or sensitive cloud environments.
- Detecting suspicious infrastructure changes, such as security control modifications or logging changes.
- Tracking cloud activity across selected accounts and regions.
- Routing cloud detections to the right teams, alerting channels, or ticketing systems.
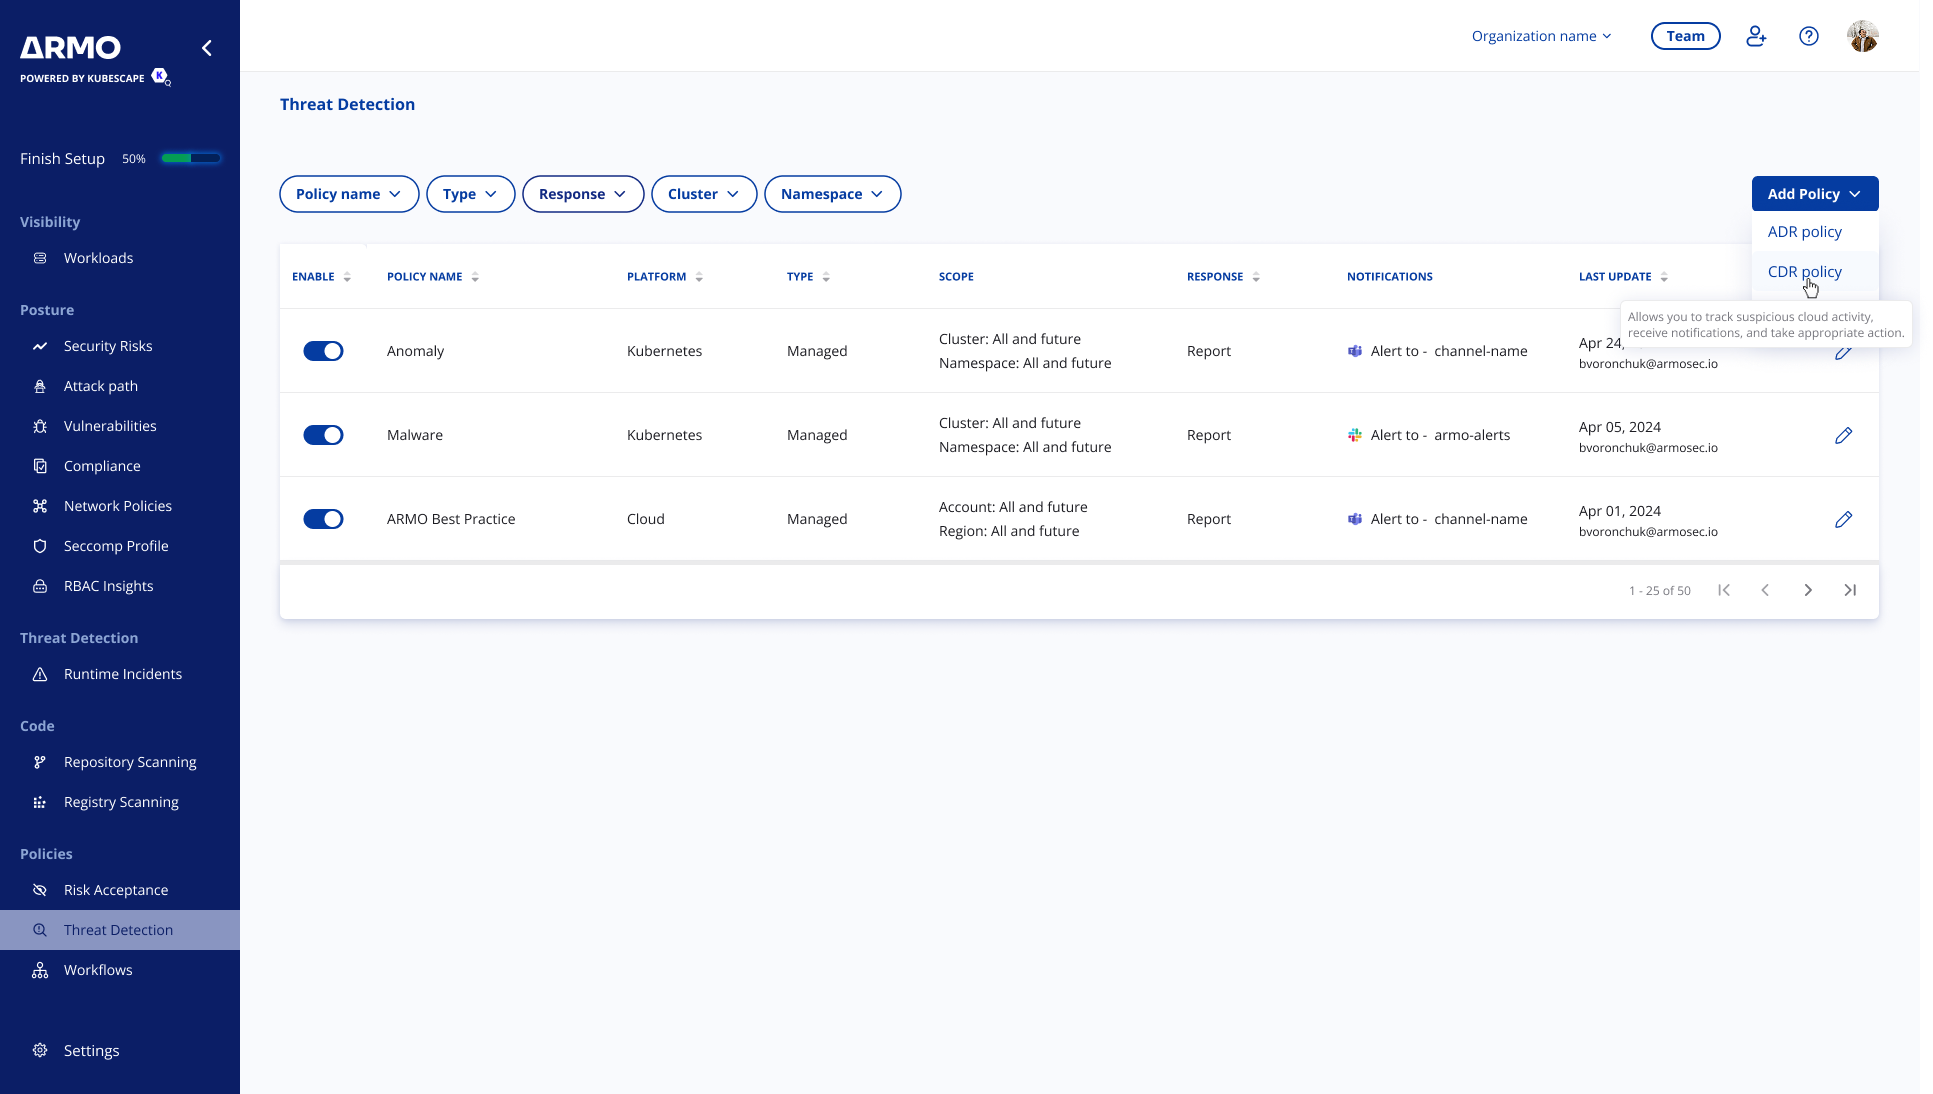
Create a CDR policy
Create a CDR policy to define which cloud environments are monitored, which rules are applied, and how detections are handled.
To create a CDR policy:
- In the ARMO platform, go to Policies > Threat Detection.
- Click Add Policy.
- Select Add CDR Policy.
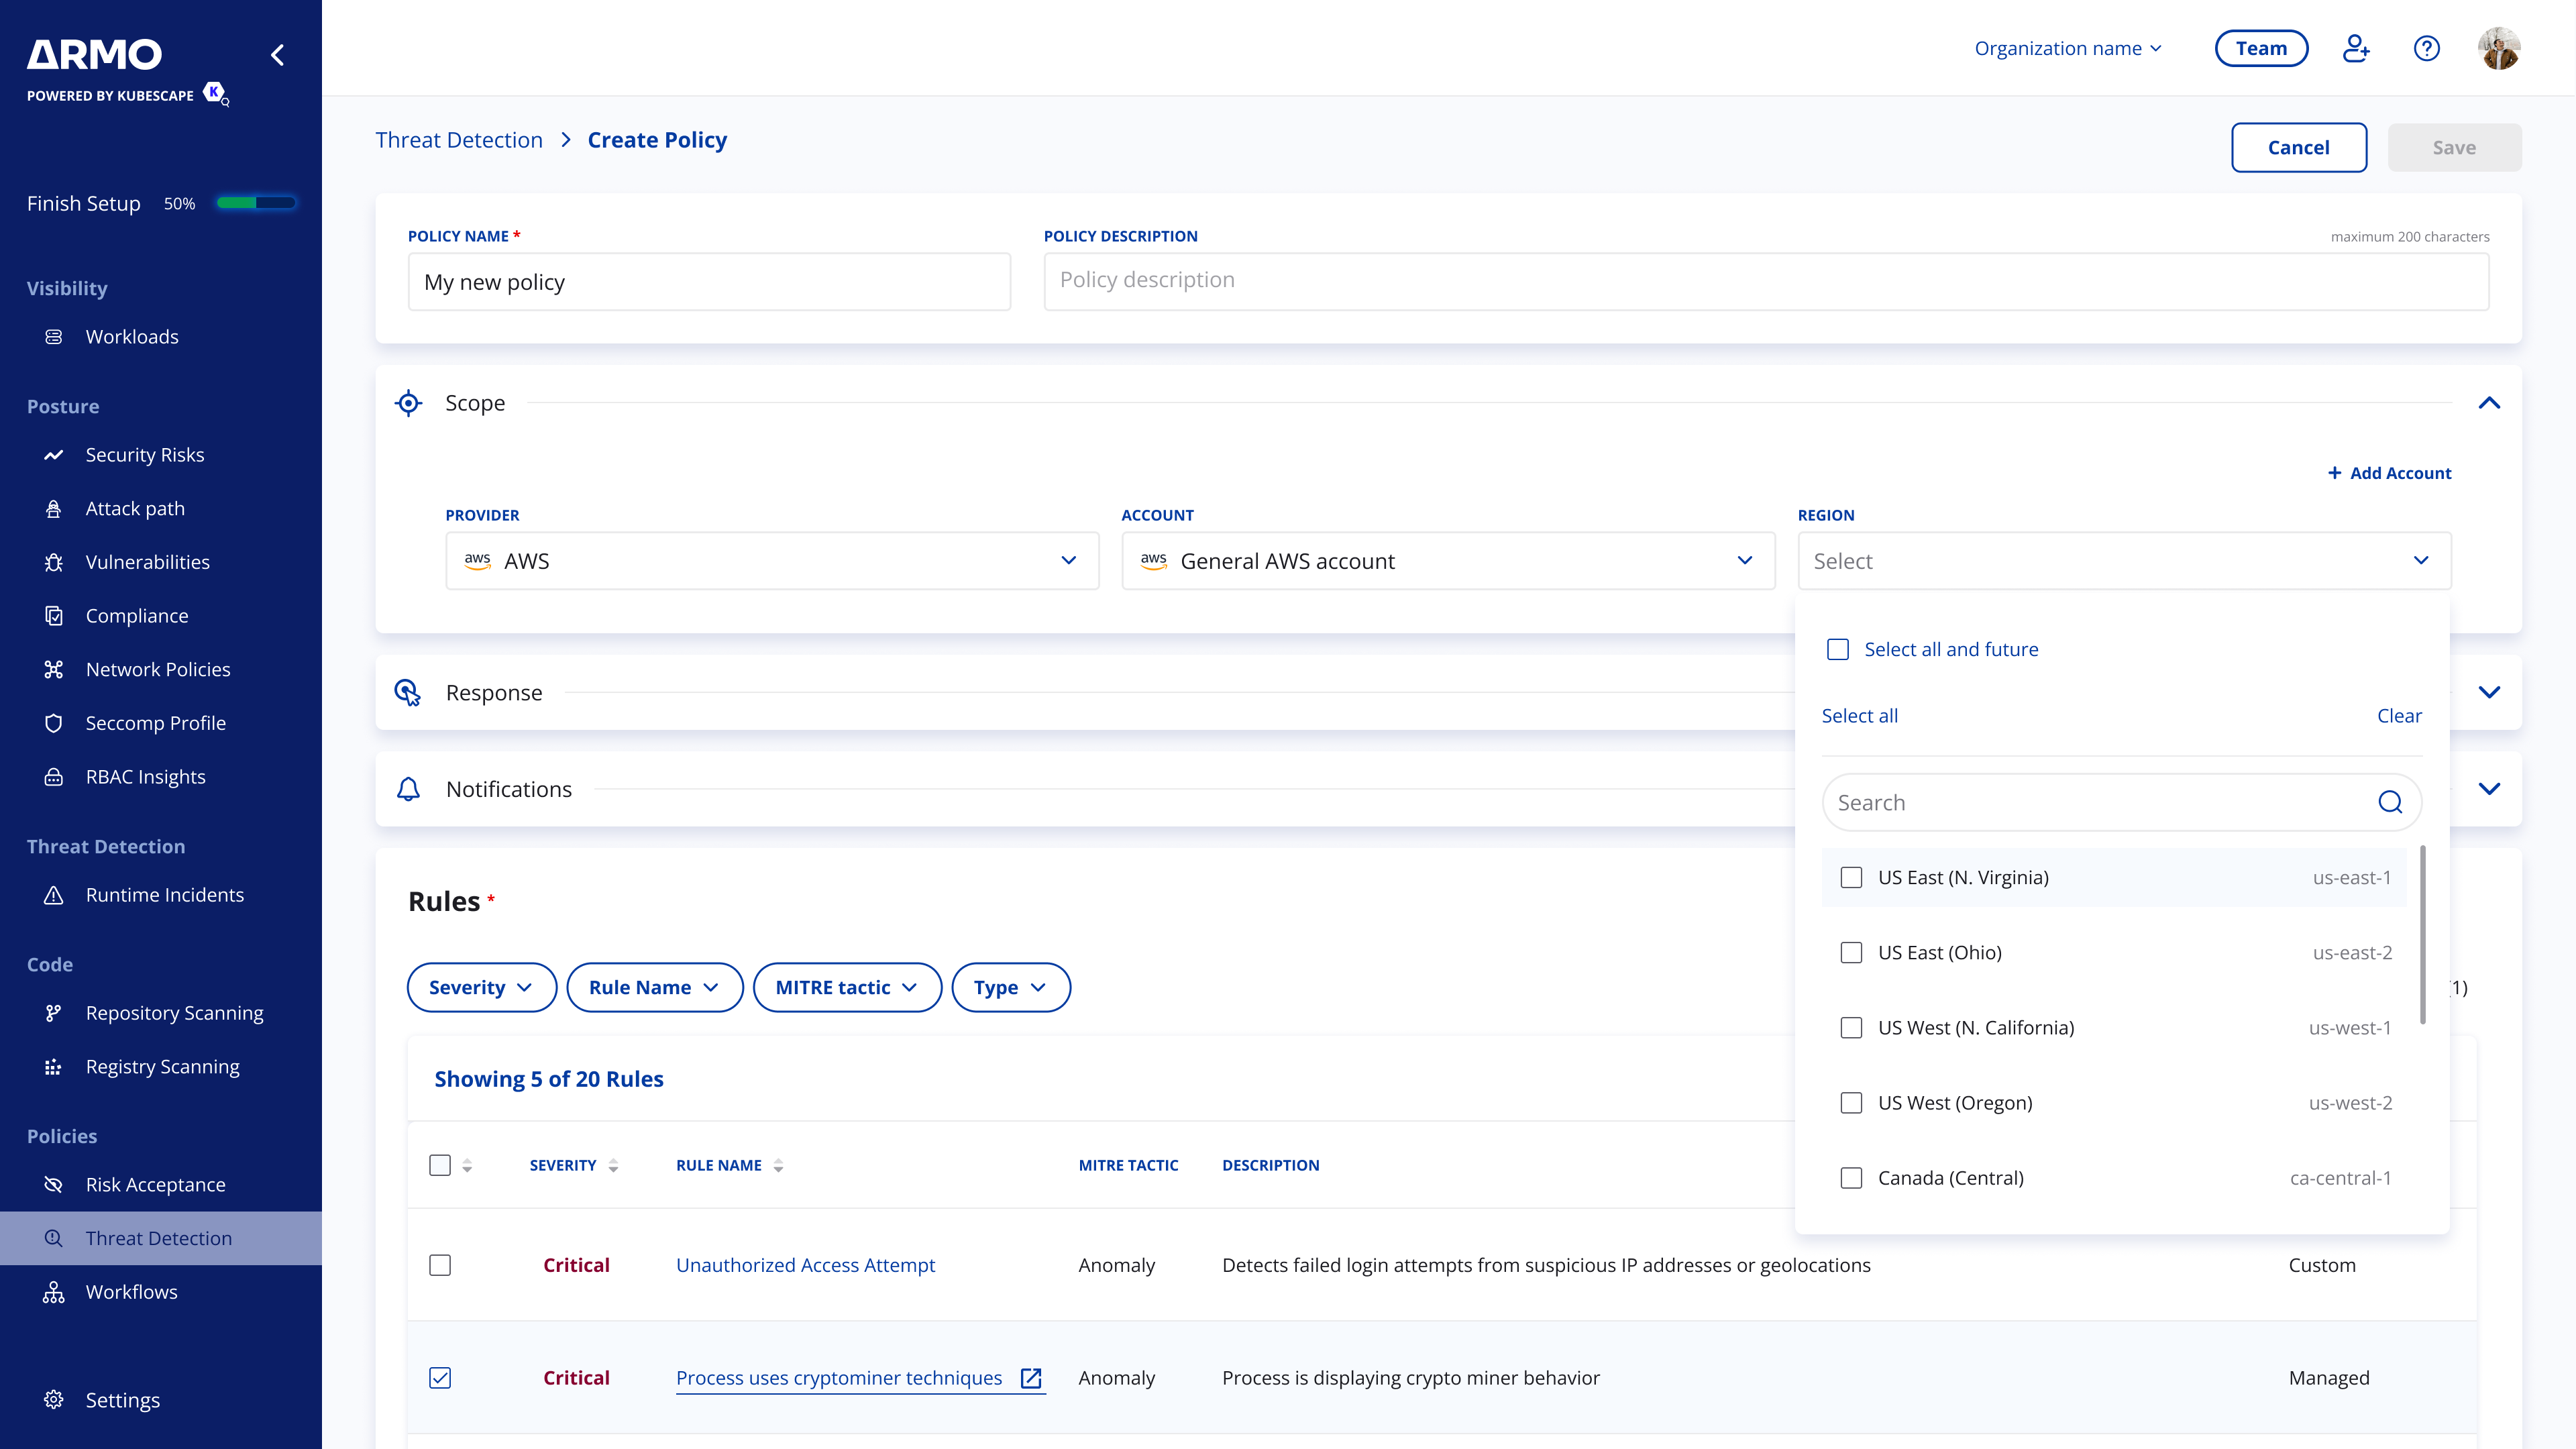
Step 1: Add policy details
Enter the basic policy details:
- Policy name — a unique name that helps identify the policy.
- Description — an optional description that explains the policy’s purpose or intended scope.
Use a clear name that describes where or why the policy is used, such as Production AWS monitoring or Sensitive cloud accounts CDR policy.
Step 2: Define the scope
Define the scope to control which cloud environments the policy monitors.
You can scope a CDR policy by selecting the cloud provider, accounts, and regions. Use scope settings to apply the policy broadly across cloud environments or narrow it to specific accounts and regions.
To define the scope:
- Expand the Scope section.
- Select the cloud provider.
- Select one or more accounts to monitor.
- Select one or more regions to monitor.
- Add another scope if you want the policy to apply to more than one provider, account, or region combination.
You can use All and future options, where available, to include existing resources and automatically include new matching resources as they are added.
Step 3: Configure actions and notifications
Configure how detections are handled when the policy scope and selected rules match.
CDR policies can report detections to the main dashboard, send alerts to external systems, and create tickets in integrated ticketing tools.
Select one or more configured integrations to notify the relevant teams when detections occur.
Depending on the integration type, the policy can:
- send alerts to notification channels, such as Slack, Microsoft Teams, or webhooks
- create tickets in integrated ticketing systems, such as Jira or Linear
Notification and ticketing integrations must be configured before they can be selected in a policy.
Step 4: Select rules
Select the rules that should be included in the CDR policy.
Rules define the cloud threat behaviors or security events the policy detects, such as suspicious infrastructure changes, security control modifications, logging changes, or other cloud activity that may indicate risk.
Use the rules table to review and select the relevant rules for the policy. You can use filters to narrow the list by attributes such as severity, rule name, MITRE tactic, rule type, or tags.
To select rules:
- Expand the Rules section.
- Review the available rules.
- Use filters to find rules relevant to the policy.
- Select one or more rules.
- Use Show selected only to review the selected rules before saving.
Each rule includes details such as severity, name, description, MITRE ATT&CK tactic, type, and tags.
Step 5: Save the policy
After configuring the policy scope, actions, notifications, and rules, click Save.
Newly created policies are enabled by default and apply to new detections moving forward. A policy does not evaluate data that was collected before the policy was created.
After the policy starts matching detections, incidents are reported to the main dashboard for review and tracking. Depending on the configured actions and notifications, detections may also trigger external alerts or create tickets in integrated systems.
Manage CDR policies
You can manage CDR policies from the Threat Detection Policies page.
From the policies table, you can:
- Enable or disable a policy — control whether the policy applies to new detections.
- Edit a policy — update the policy scope, actions, notifications, or rules.
- Filter policies — find policies by name, type, scope, or other available filters.
Disabling a policy stops it from applying to new detections. Existing incidents that were already reported remain available in the main dashboard for review and tracking.
Updated 7 days ago