
Onboard GCP Project
Overview & Objectives
Purpose:
This document describes how to onboard a single GCP project into the ARMO Platform. After onboarding, ARMO will have read-only visibility into the project’s resources, IAM policies, network exposure, and audit logs so that it can evaluate compliance, monitor for misconfigurations and risks, and surface attack paths.
Prerequisites
| Item | Requirement |
|---|---|
| ARMO Platform | You have an admin or Manager access to ARMO Platform |
| GCP project access | You have Owner or IAM Admin permissions in the GCP project you intend to onboard. |
| IAM permissions |
|
| Service account keys | Your organization policy allows creating service account keys (iam.disableServiceAccountKeyCreation is not enforced on the project). |
Required IAM Roles
The service account that ARMO uses is granted the following roles:
| Role Name | Type | Purpose |
|---|---|---|
| Viewer | Predefined | Read-only access to cloud resources |
| Security Reviewer | Predefined | View IAM policies, roles and bindings |
| Service Usage Consumer | Predefined | Allows ARMO to call the enabled APIs |
| ARMO CSPM | Custom | Allows ARMO to read bucket IAM policies |
High-Level Flow
- In the ARMO platform: initiate the “Connect GCP” flow and enter the display name and the Project ID.
- In the GCP project: enable the required APIs.
- In the GCP project: create a custom IAM role and a service account (e.g.
cspm-cloud-security) with the required roles. - In the GCP project: generate a JSON key for the service account.
- In ARMO: upload the JSON key and connect the project.
- Verify data ingestion, alerts, and resource visibility.
Detailed Step-by-Step Onboarding
Step 1: Initiate Onboarding in ARMO Platform
-
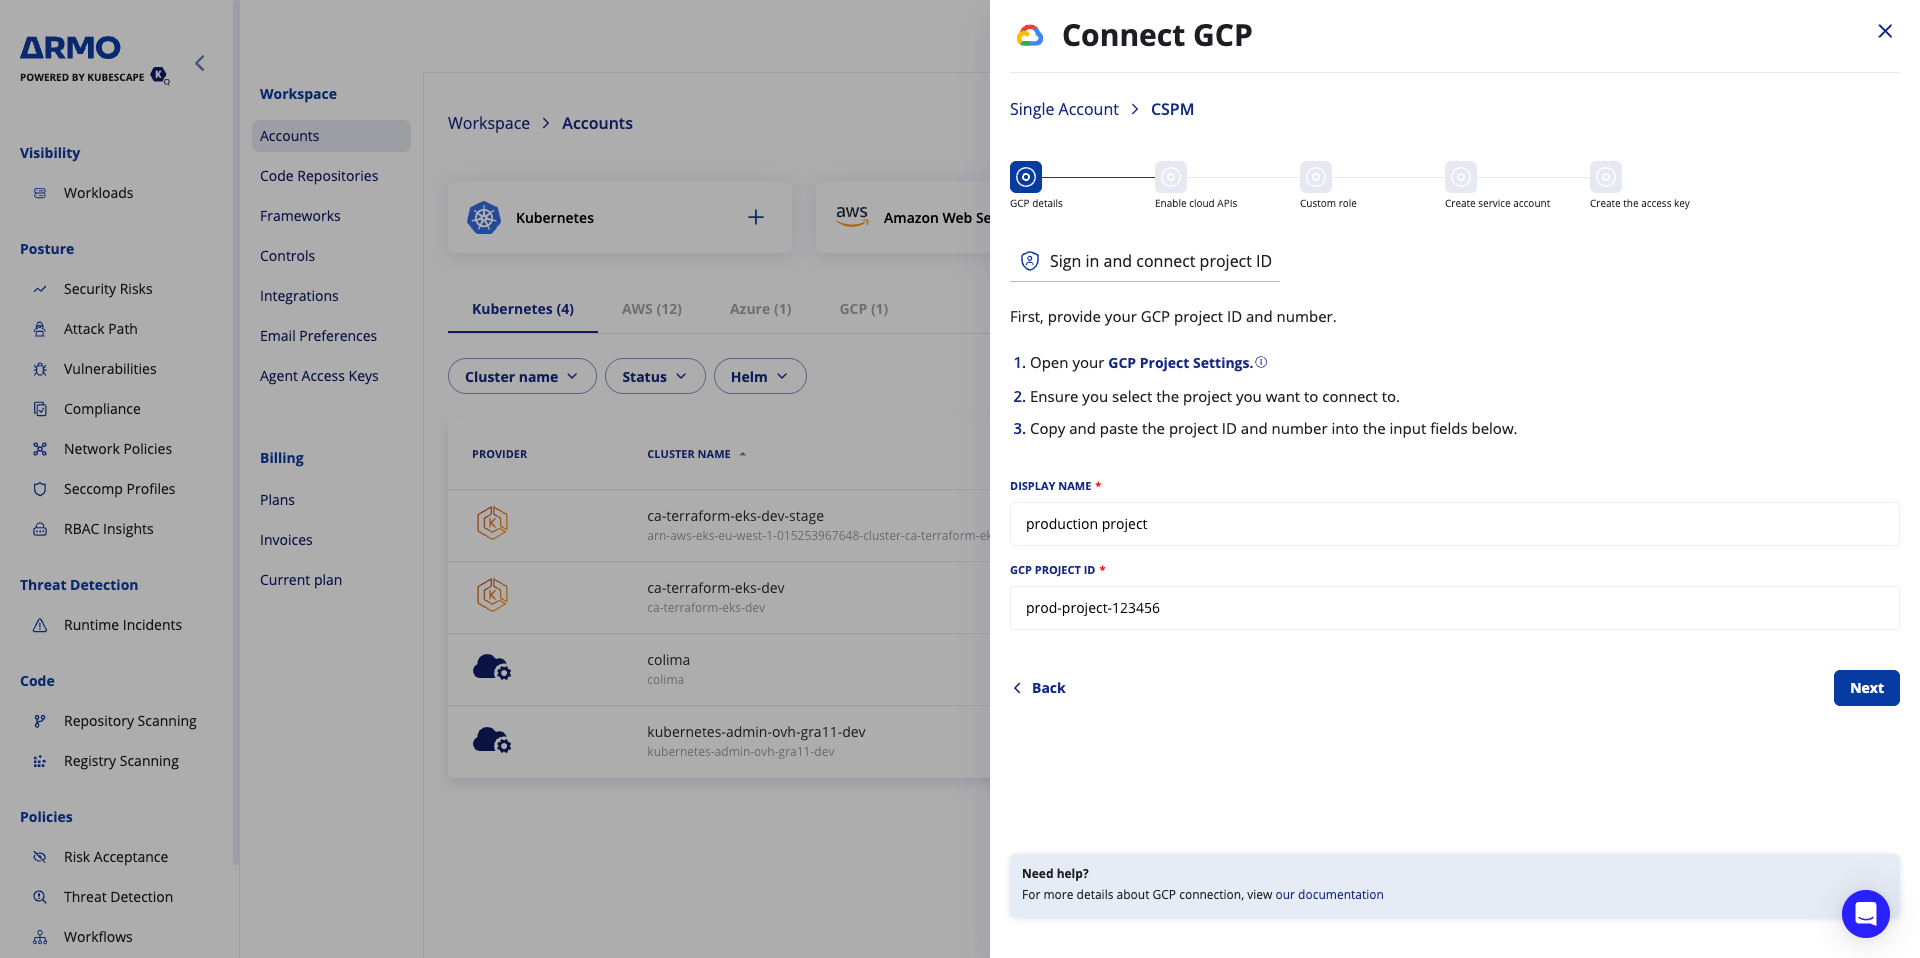
Log in to the ARMO Platform and navigate to Settings → Accounts → GCP
-
Click the Google Cloud Platform card → Click Single Project → Click Next
-
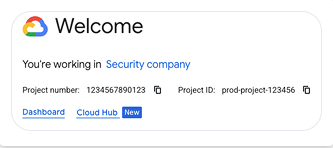
In the Google Cloud Console, select the target project and go to Project Settings
-
Copy the Project ID
-
Back in ARMO, paste the Project ID and enter a Display name
Step 2: Enable the Required APIs in the GCP Project
In the target GCP project (the one being onboarded):
-
Click the Activate Cloud Shell icon at the top right of the GCP Console. An interactive shell opens at the bottom of the screen.
-
Make sure the shell is pointing at the right project:
gcloud config set project <PROJECT_ID> -
Copy the command below, paste it into the shell and run it. A success message appears once it completes.
gcloud services enable serviceusage.googleapis.com cloudresourcemanager.googleapis.com iam.googleapis.com compute.googleapis.com storage.googleapis.com bigquery.googleapis.com sqladmin.googleapis.com container.googleapis.com dataproc.googleapis.com dns.googleapis.com cloudkms.googleapis.com apikeys.googleapis.com logging.googleapis.com monitoring.googleapis.com accessapproval.googleapis.com essentialcontacts.googleapis.com containeranalysis.googleapis.com containerscanning.googleapis.com cloudasset.googleapis.com
Step 3: Create the Custom IAM Role
-
Go to IAM & Admin → Roles
-
Click + Create Role
-
Enter a Title (e.g.
ARMO CSPM), Description, ID and Role launch stage -
Click Add permissions and add:
storage.buckets.getIamPolicy -
Click Create
Step 4: Create the Service Account and Assign Roles
- Go to IAM & Admin → Service Accounts
- Click Create service account
- Name it (e.g.
cspm-cloud-security) and click Create and continue - Assign the following roles:
- Viewer
- Security Reviewer
- Service Usage Consumer
- ARMO CSPM (the custom role from Step 3)
- Click Done
Step 5: Generate a JSON Key and Connect in ARMO
- Open the service account you created
- Go to the Keys tab
- Click Add Key → Create new key
- Select JSON and click Create. The key file downloads to your machine.
- Return to the ARMO platform where you initiated the “Add GCP” flow
- Upload the downloaded JSON file
- Click Connect
- If ARMO shows “Congratulations”, then the onboarding is successful.
Security note: The JSON key grants access to the service account. Once it is uploaded to ARMO, delete the local copy and do not commit it to source control.
Step 6: Confirm Data Ingestion & Monitoring
- In ARMO, check that the project appears in the Settings / Accounts / GCP table.
- Check that ARMO is showing scanning results on the Compliance > Cloud page.
- Initial results typically appear within up to 60 minutes.
Troubleshooting
| Issue | Likely Cause | Suggested Fix |
|---|---|---|
| Connection fails / “permission denied” | One or more required roles is missing from the service account | In IAM & Admin → IAM, confirm the service account has all four roles from the table above |
| Some resource types are missing from results | The corresponding API was not enabled | Re-run the gcloud services enable command from Step 2 in the correct project |
| Bucket IAM findings are missing | The custom role was not created or not assigned | Verify the custom role includes storage.buckets.getIamPolicy and is assigned to the service account |
| “Create new key” is greyed out or fails | Org policy iam.disableServiceAccountKeyCreation is enforced | Ask your GCP org admin to allow key creation for this project |
| Project not found / wrong data shown | Typo in the Project ID, or the Project Name was used instead of the Project ID | Copy-paste the exact Project ID from Project Settings |
| Key upload rejected | Wrong file uploaded, or the key was created in a different project | Upload the JSON key of the service account created in the onboarded project |
Updated about 3 hours ago